✷ メイカー
I turned a $4 toy robot into an AI robot that talks back
A toy robot from a Chinese marketplace app, an old Android phone, a little FT232H board, a few wires, a piece of cardboard and two rubber bands. A month later it listens when you talk, drives itself, answers back — and if you bark at it twice, it turns around and runs. This is how it came together, one step at a time, along with the very dumb but very funny mistakes I made on the way.
この記事はまだ日本語版がありません。英語の原文を表示しています。
It started with a post by Mario Zechner, How to build a shitty robot. Mario wrote the Pi agent. He bought a toy robot at a toy shop for €10, opened it up, wired in an FT232H so his phone could drive it over WebUSB, and installed an agent he had built on pi as its brain.
As soon as I finished reading, I wanted to build one for my kid. Having a little companion to play with was half the reason.
The other half was about learning. Most AI apps out there work by taking a photo of the problem, and out comes the answer. That's not how I want my kid to use AI. What I want my kid to learn is how to talk with AI: say clearly what you don't understand, listen to the answer and ask one more question, push back when something sounds wrong. That's how a problem gets talked through instead of merely answered.
I think that's a skill in its own right, and it will only matter more. A robot you have to ask out loud — and that talks back — makes you practise it.
I followed his skeleton: a phone as the brain, an FT232H and WebUSB. But I picked a different robot and put the brain somewhere else, so every pitfall after that was a different one.
1. Buy the cheapest one

The star is a Silverlit Maze Breaker, bought on Xianyu, a Chinese marketplace app, for 29.87 yuan — about $4.
As it happens, Mario's robot is a Silverlit too, a YCOO NEO OCTOBOT. It walks on legs, steers by turning its head, and can only turn one way. Mine runs on tracks and has a separate steering mechanism (more on that in the next section) that turns both left and right.
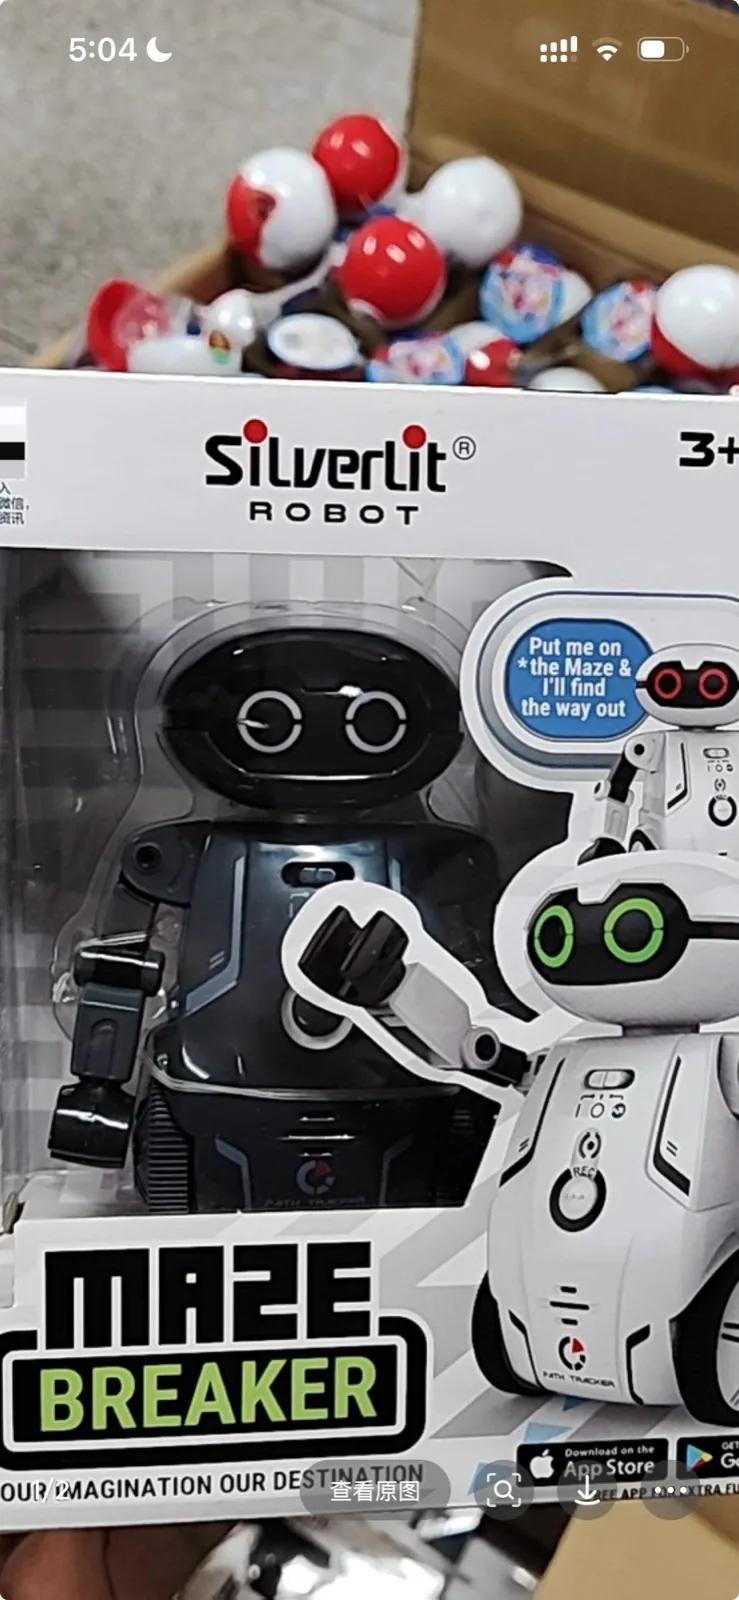
There was no special reason to pick it. I couldn't find the same model Mario had, and then it occurred to me that these toys all work the same way: a motor plus a driver chip. If it didn't work out I'd just buy another one. At 30 yuan, breaking it wouldn't hurt.
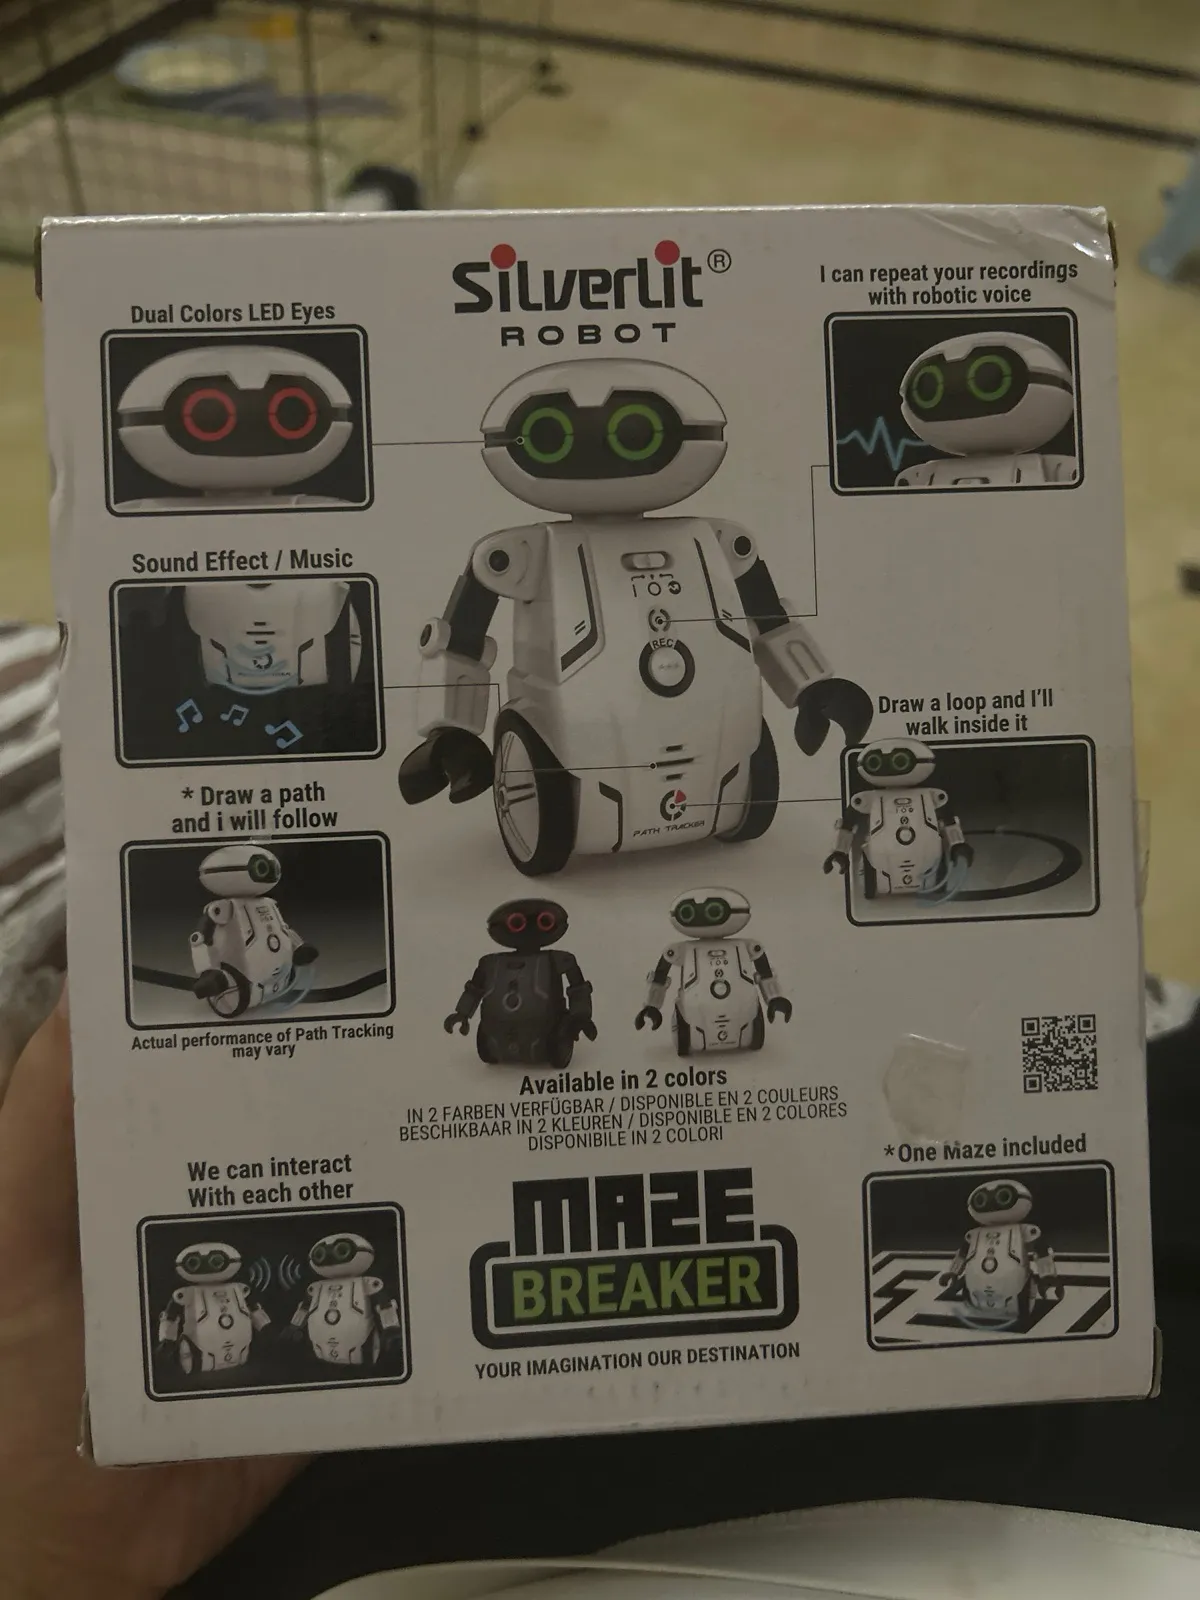
The back of the box lists what it could already do: draw a line on the floor and it follows it; put it in a maze and it finds the way out; record your voice and it plays it back in a robot voice. In other words, it already had a microphone and a speaker — it just had no brain.
2. What's inside
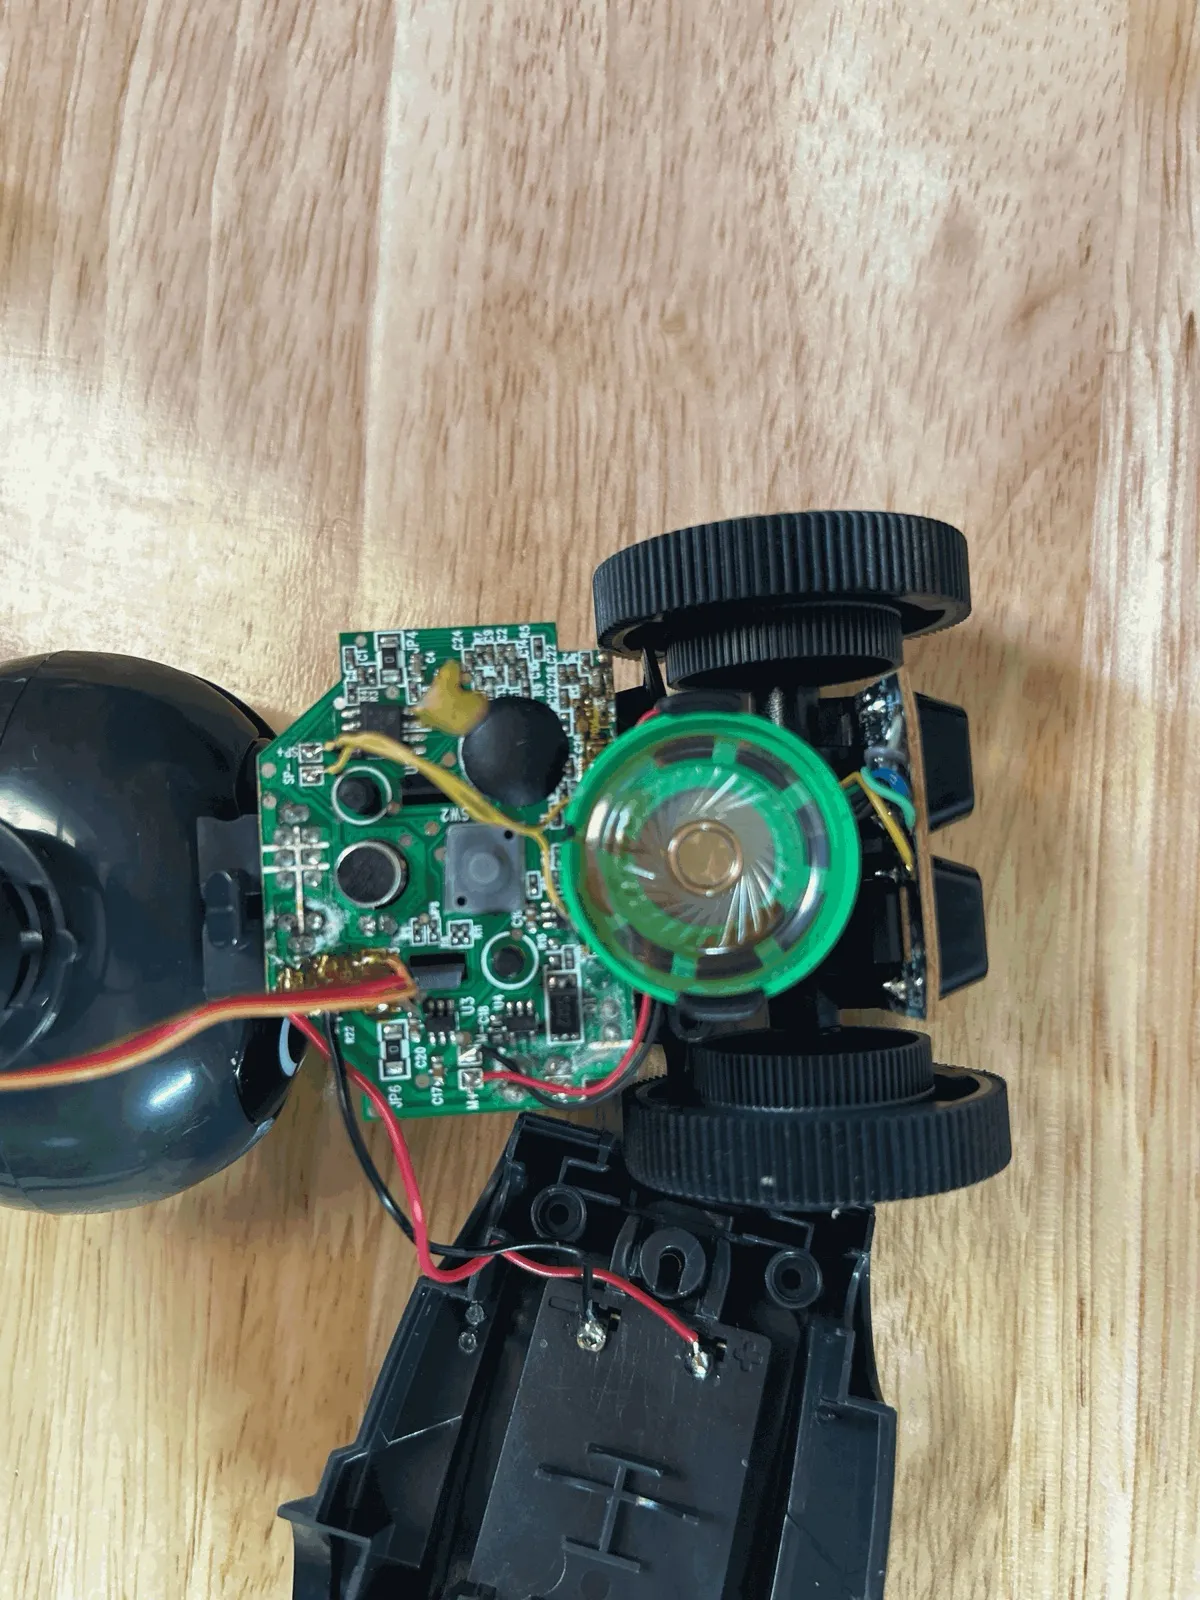
Inside there's a small green board and a speaker, with the battery compartment and the tracked chassis underneath. Less than I expected, but one thing is clever: it has only one motor.
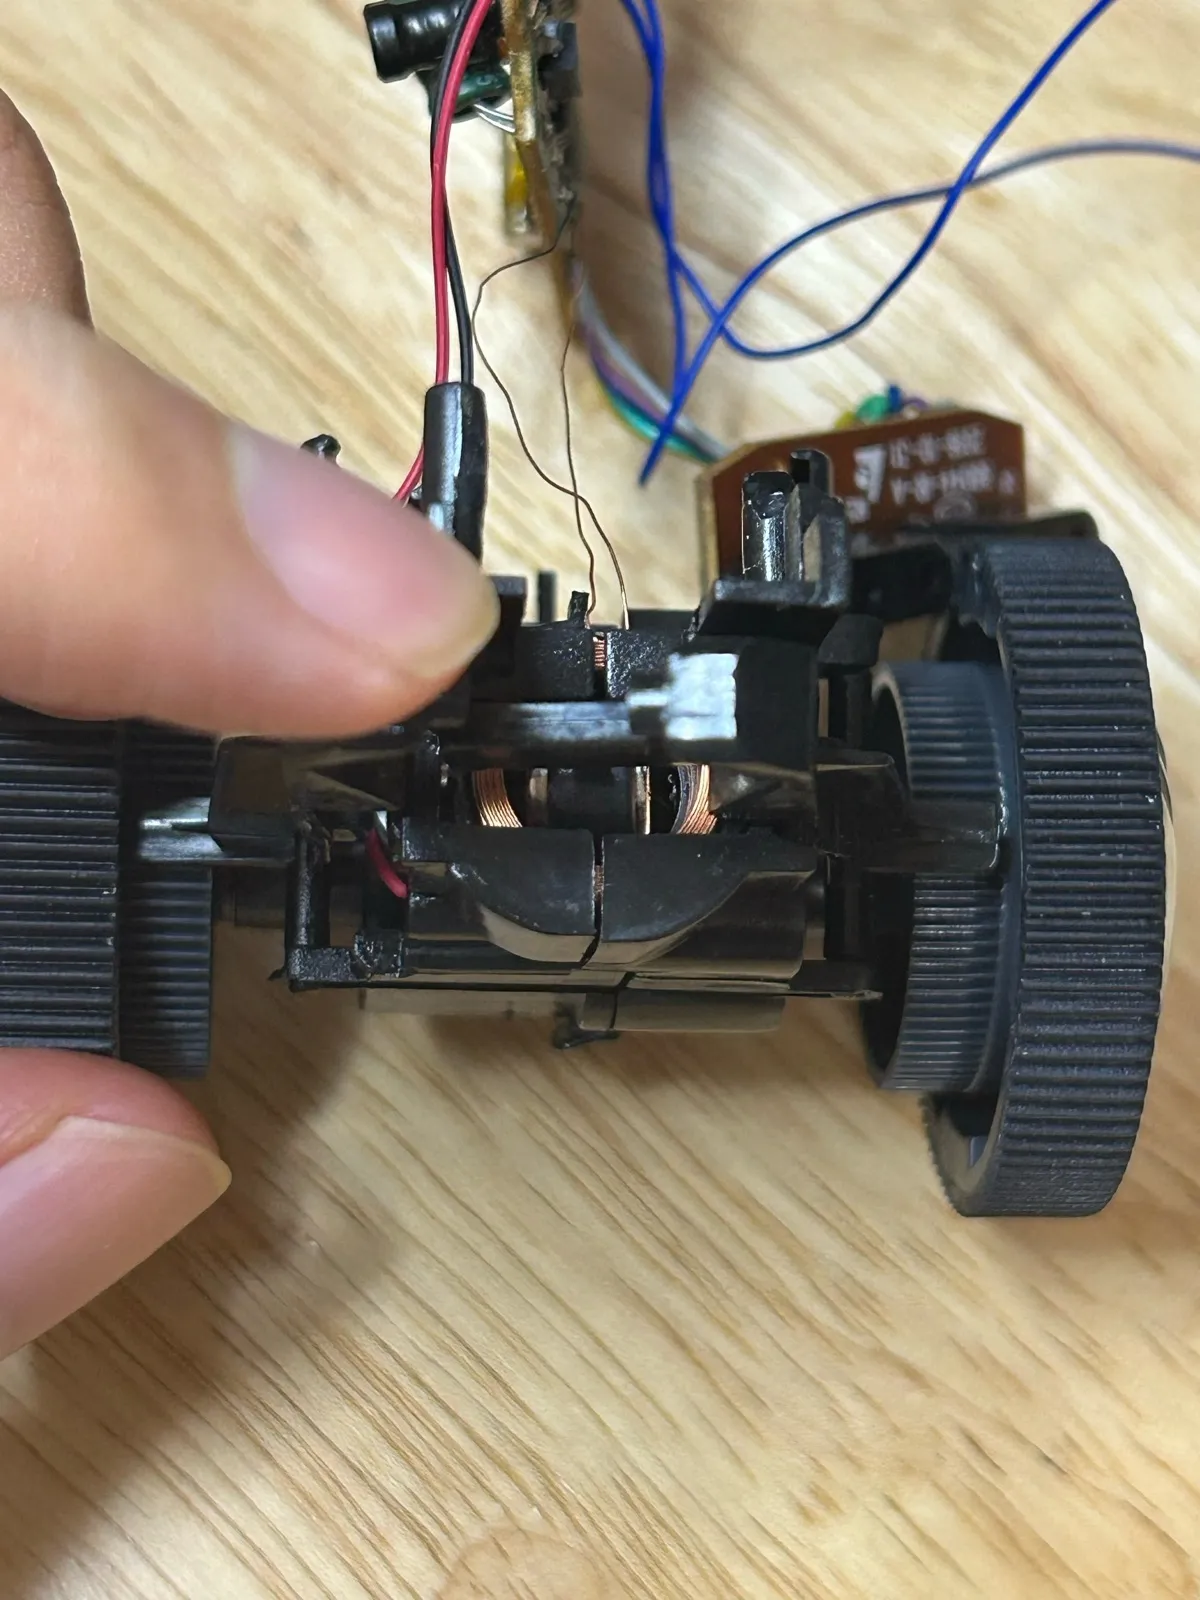
I assumed it steered by running the two sides at different speeds. It doesn't. Steering is done by a small electromagnet: next to a coil hangs an armature carrying a permanent magnet. Current one way swings it to one side; the other way swings it to the other side; cut the power and a spring pulls it back to the middle. Most cheap RC cars turn like this.
So the board has two driver chips: U3 drives the motor (forward, back) and U5 drives the electromagnet (left, right). Two chips, two inputs each, four wires in total. Whoever controls those four wires controls the car.
3. Four wires to a phone
The idea is simple: leave the factory brain alone, bring in four wires from outside, and drive the two chips' input pins directly.
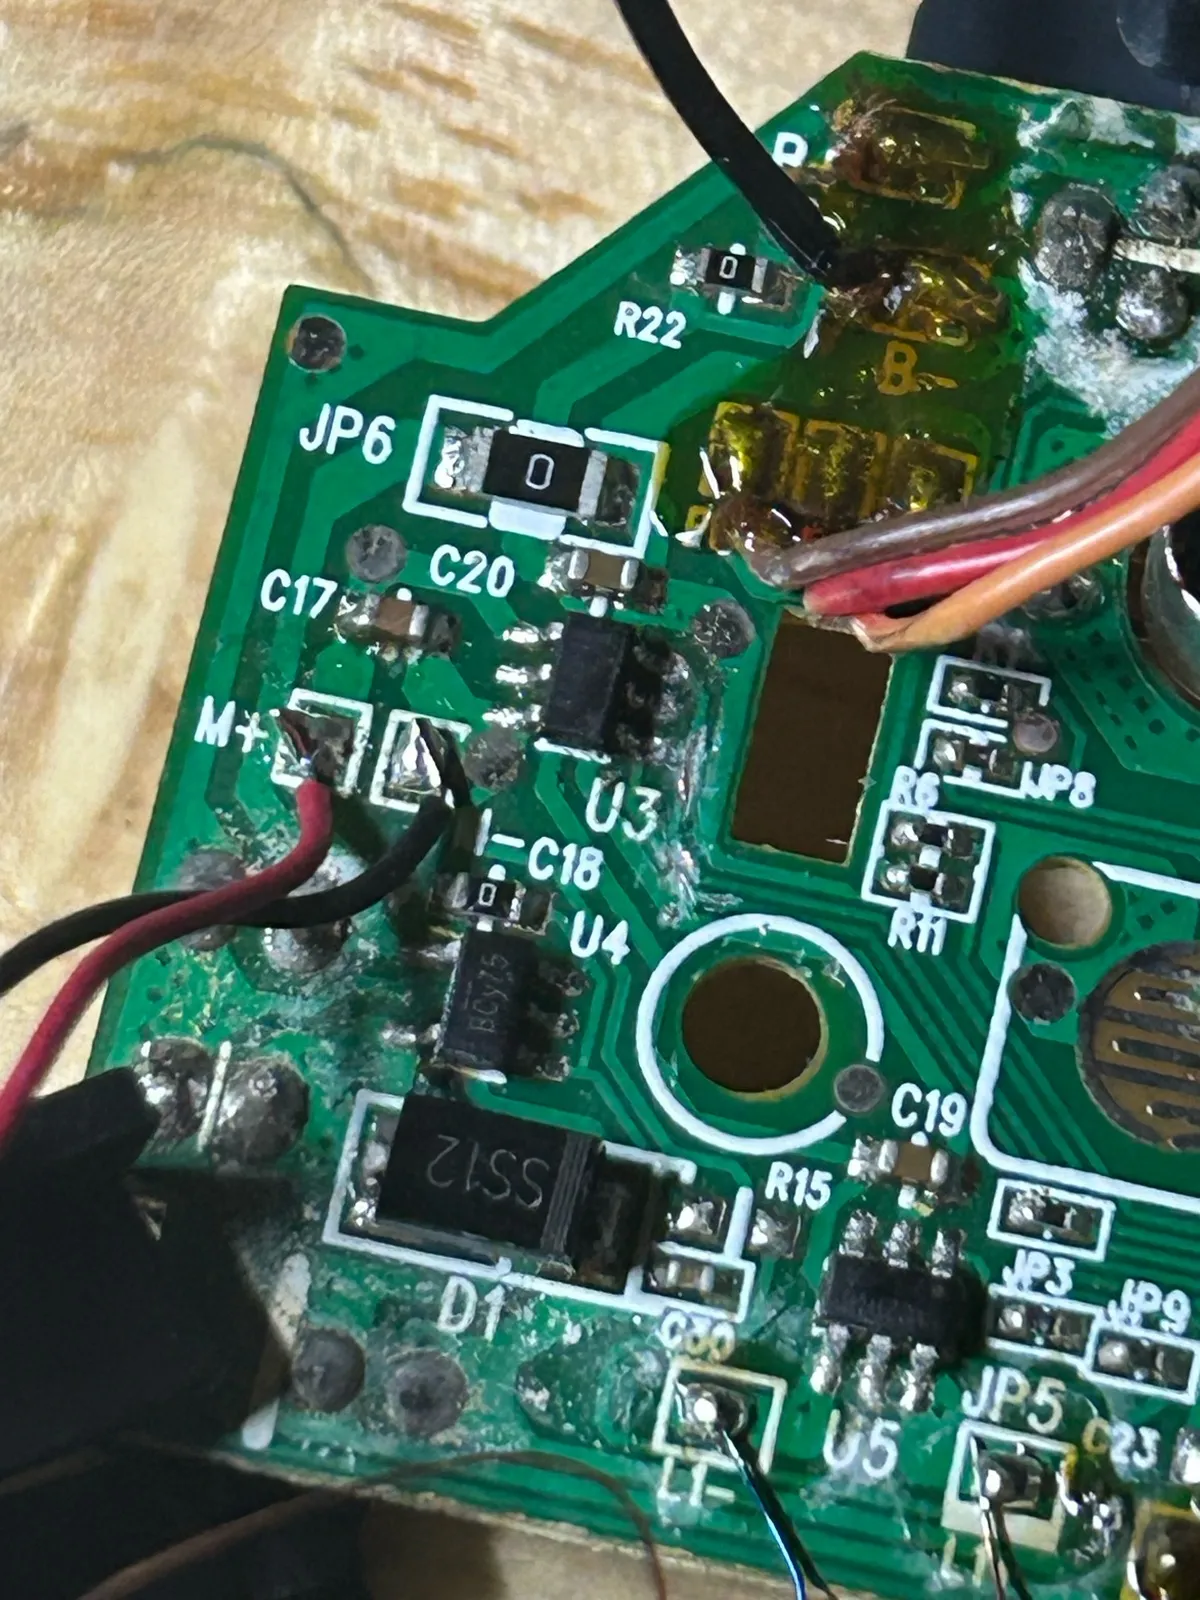
The factory brain is a chip sealed under a blob of black epoxy (the black dot near the bottom of the board). The first step is to cut the trace between it and U3, otherwise the two would fight over the motor.
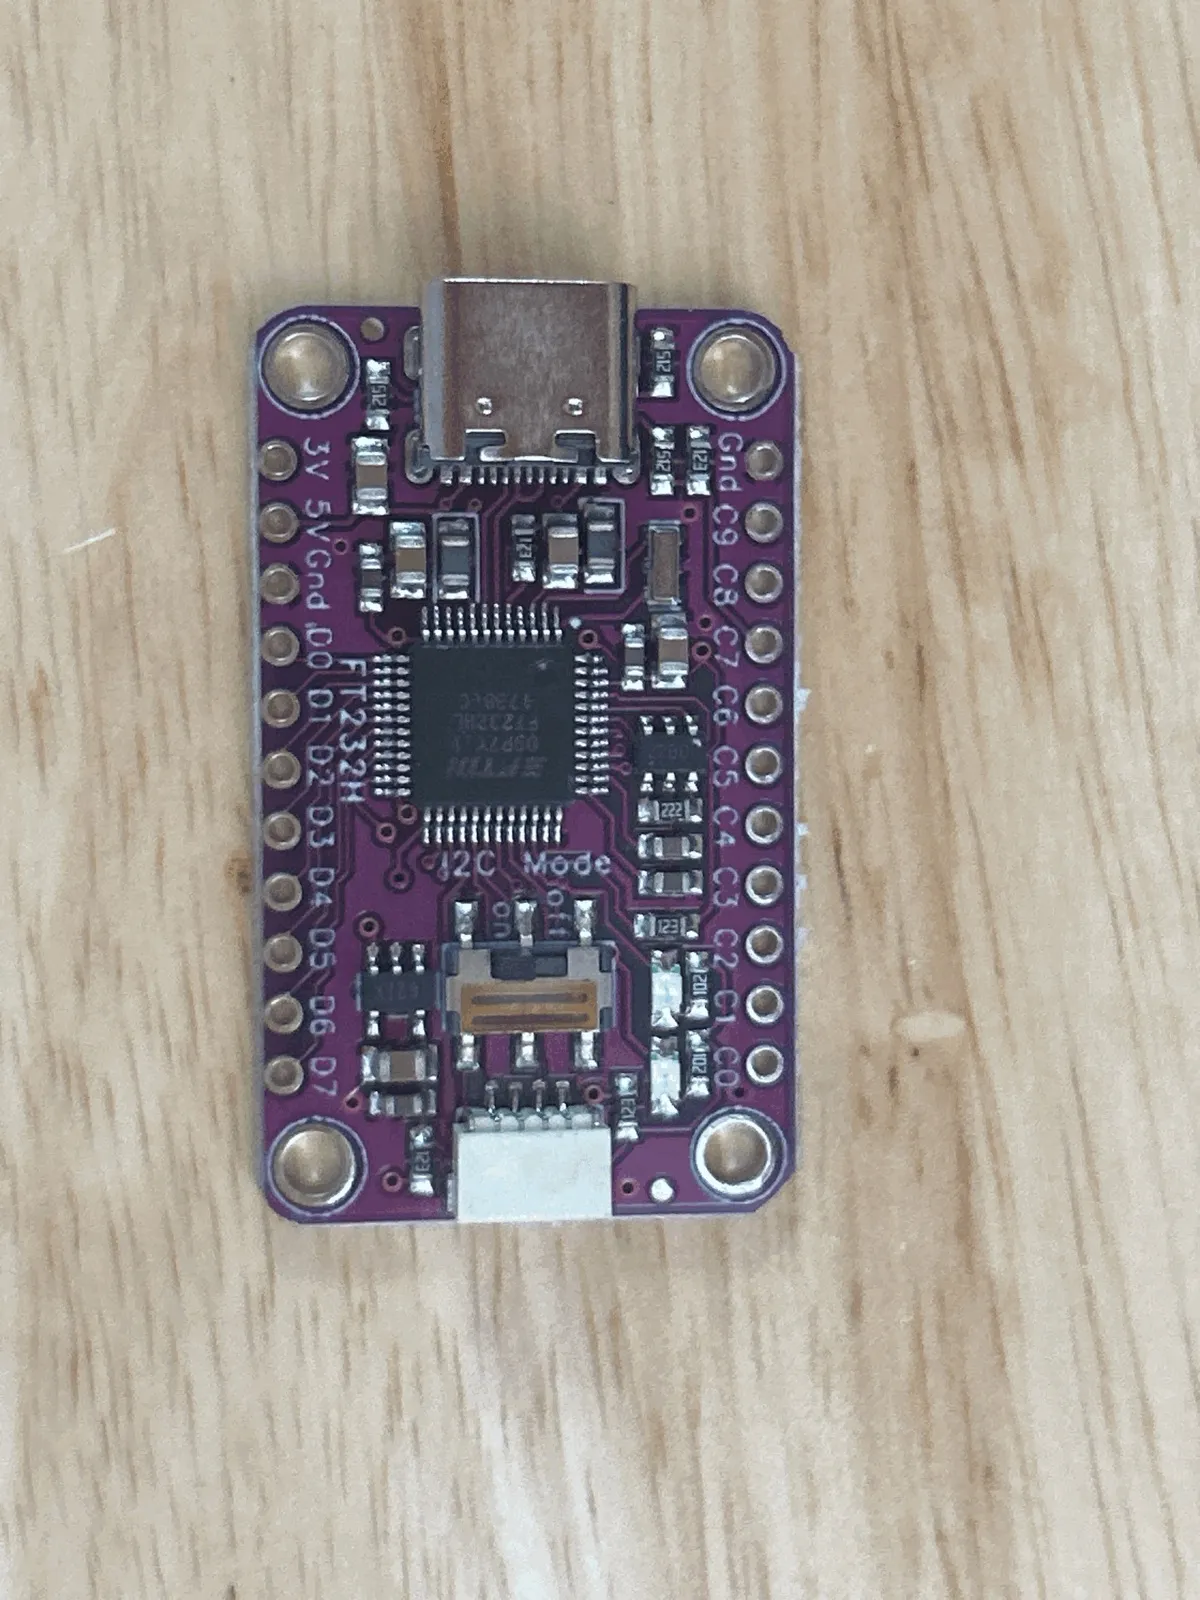
The wires are driven by this FT232H. One end is USB-C; the other has a row of pins that can be pulled high or low at will. The phone plugs into it with a USB cable, a web page talks to it over WebUSB, and each byte is one set of pin states: 0x10 is forward, 0x00 is all stop.
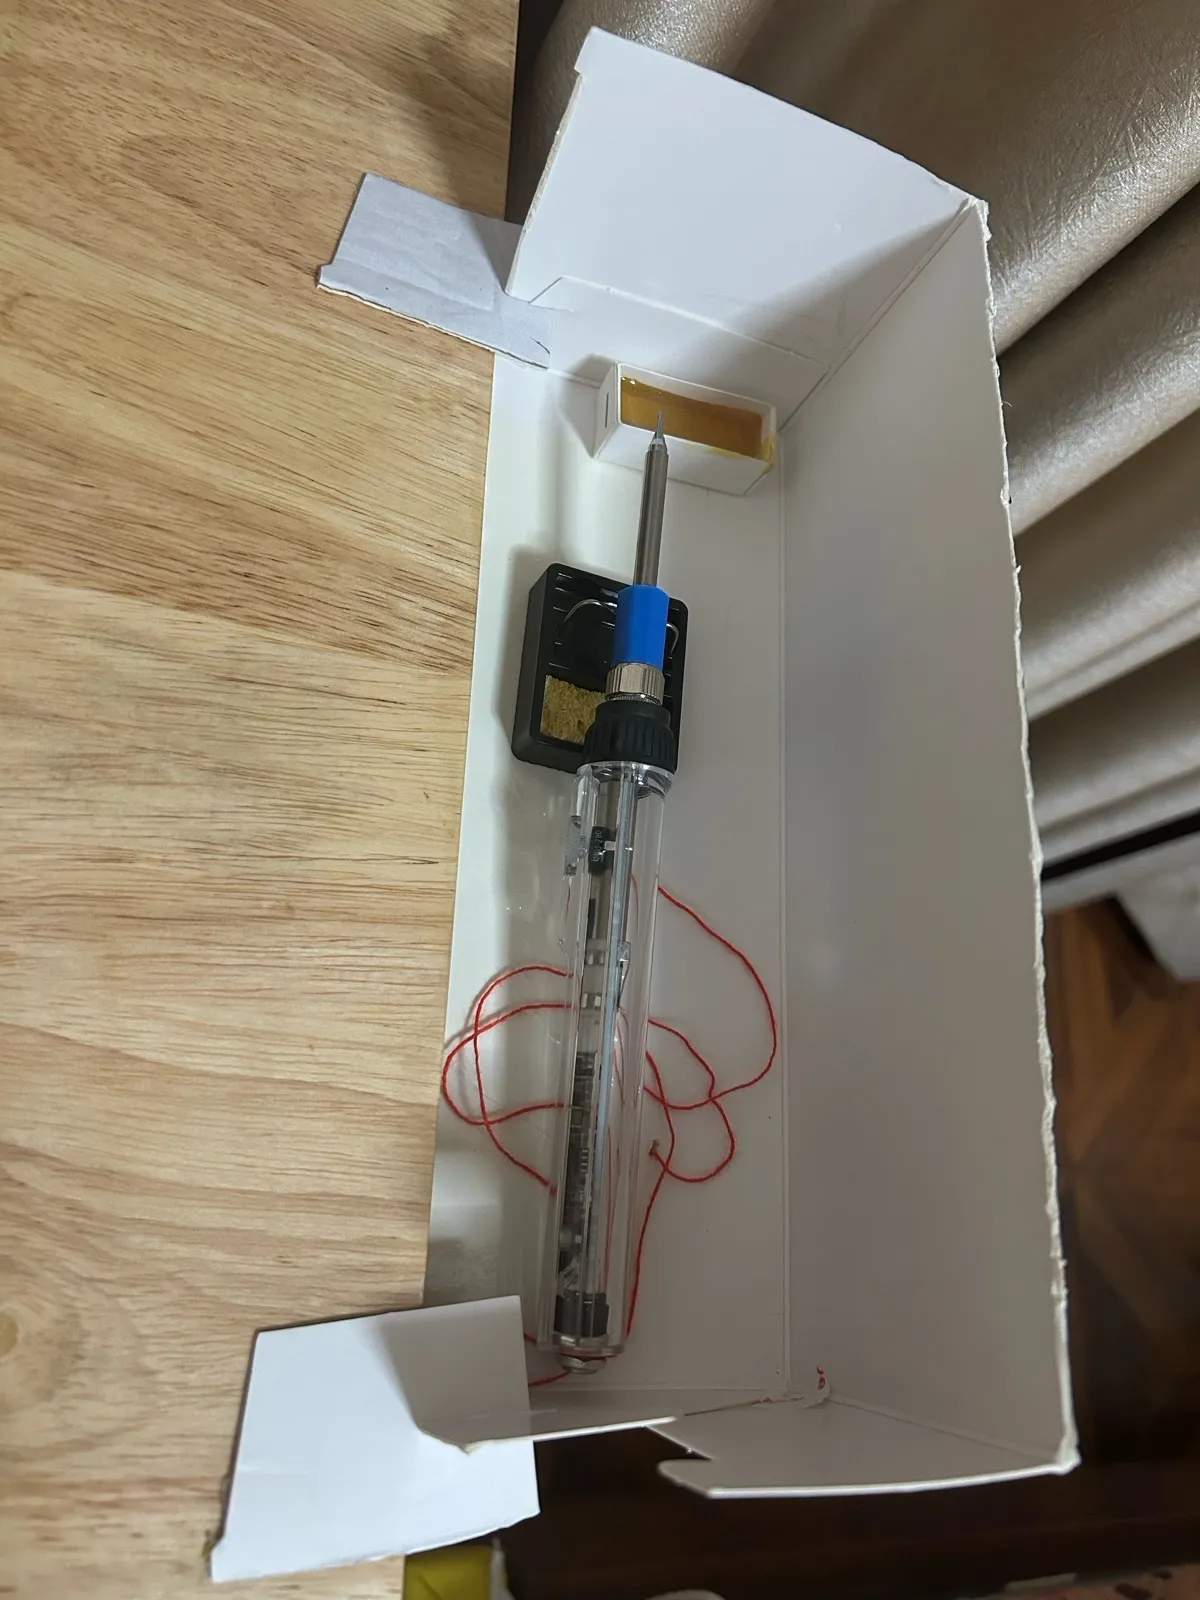
Then comes the soldering.
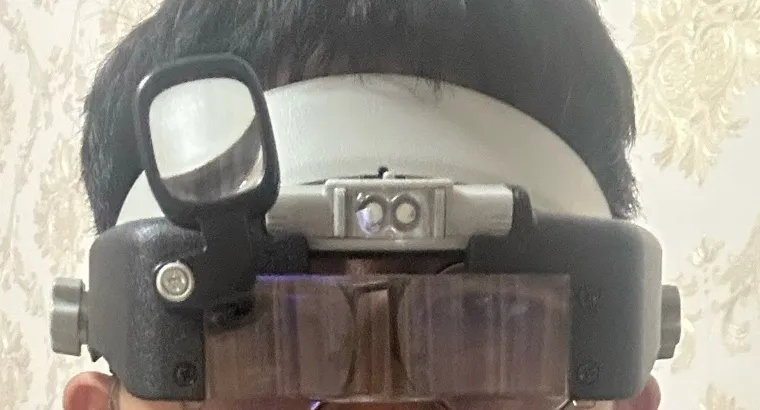
The joints and pads on this board are absurdly small, impossible to line up by eye, so I ended up wearing one of these head-mounted magnifiers. It looks silly, but it works.
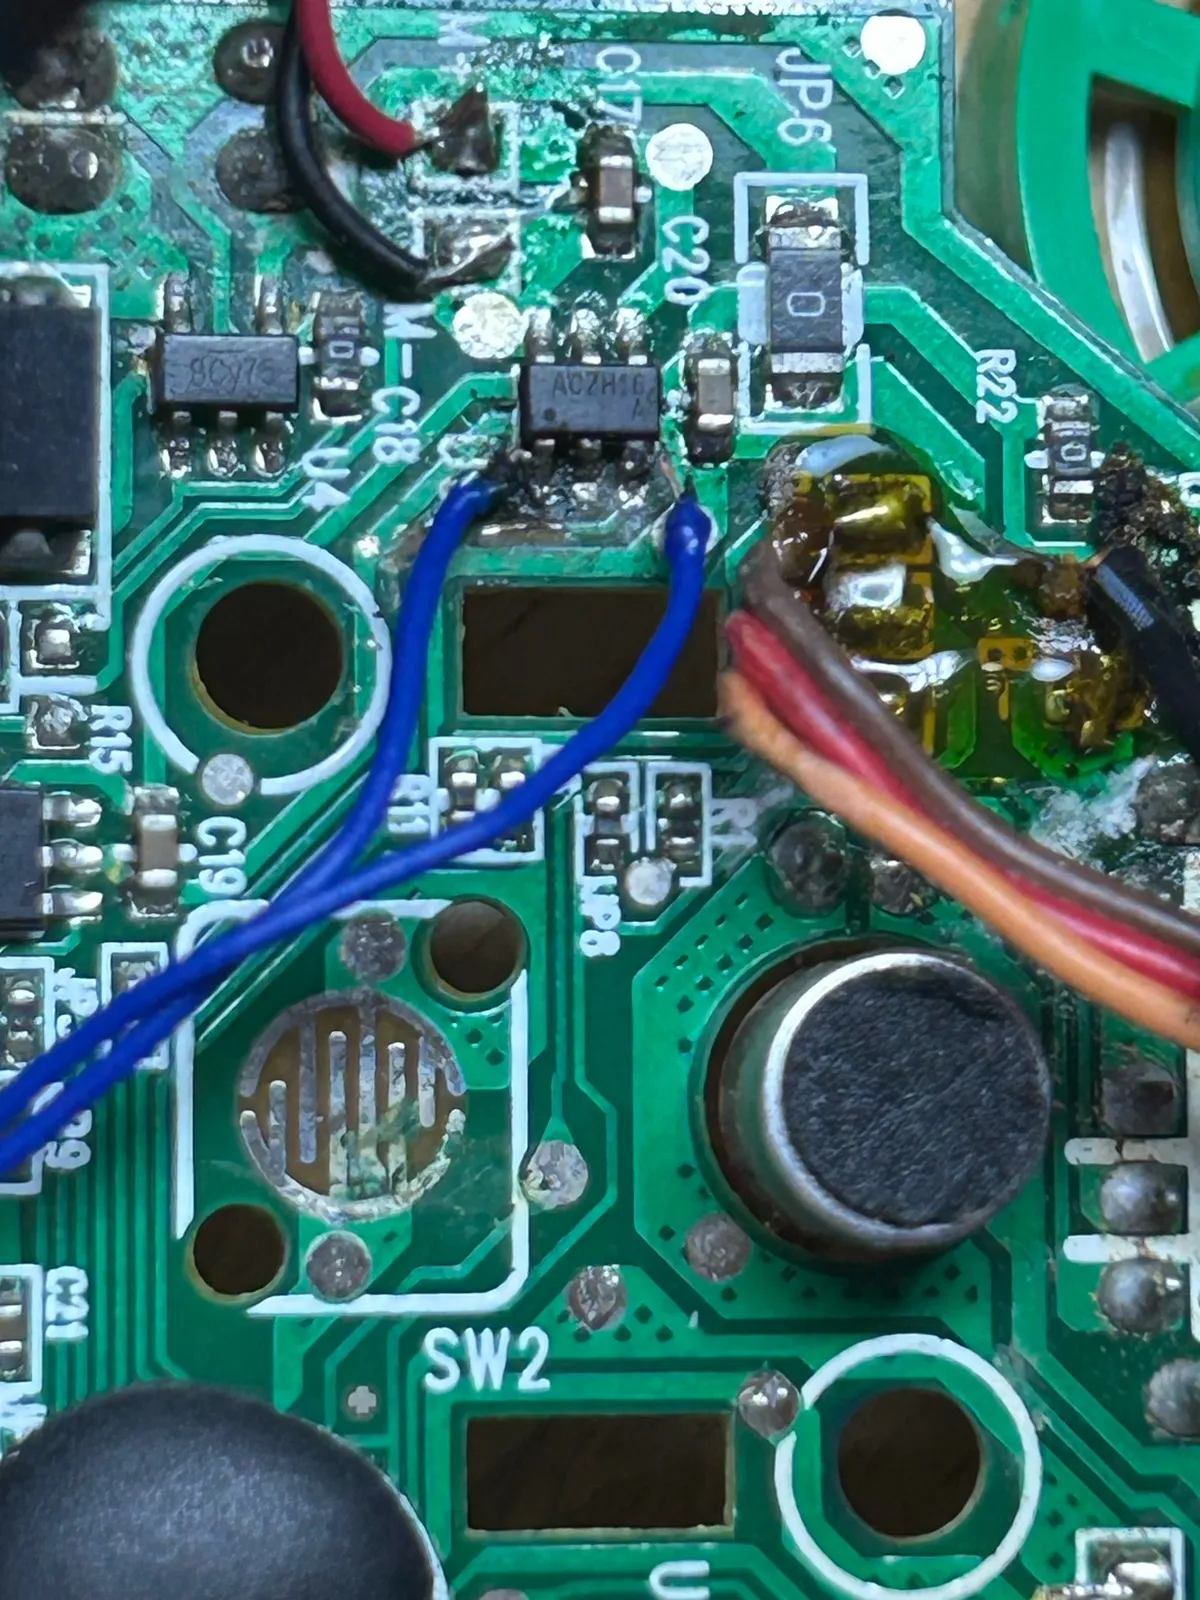
U3 first. Two blue wires soldered on, and the car could go forward and back.
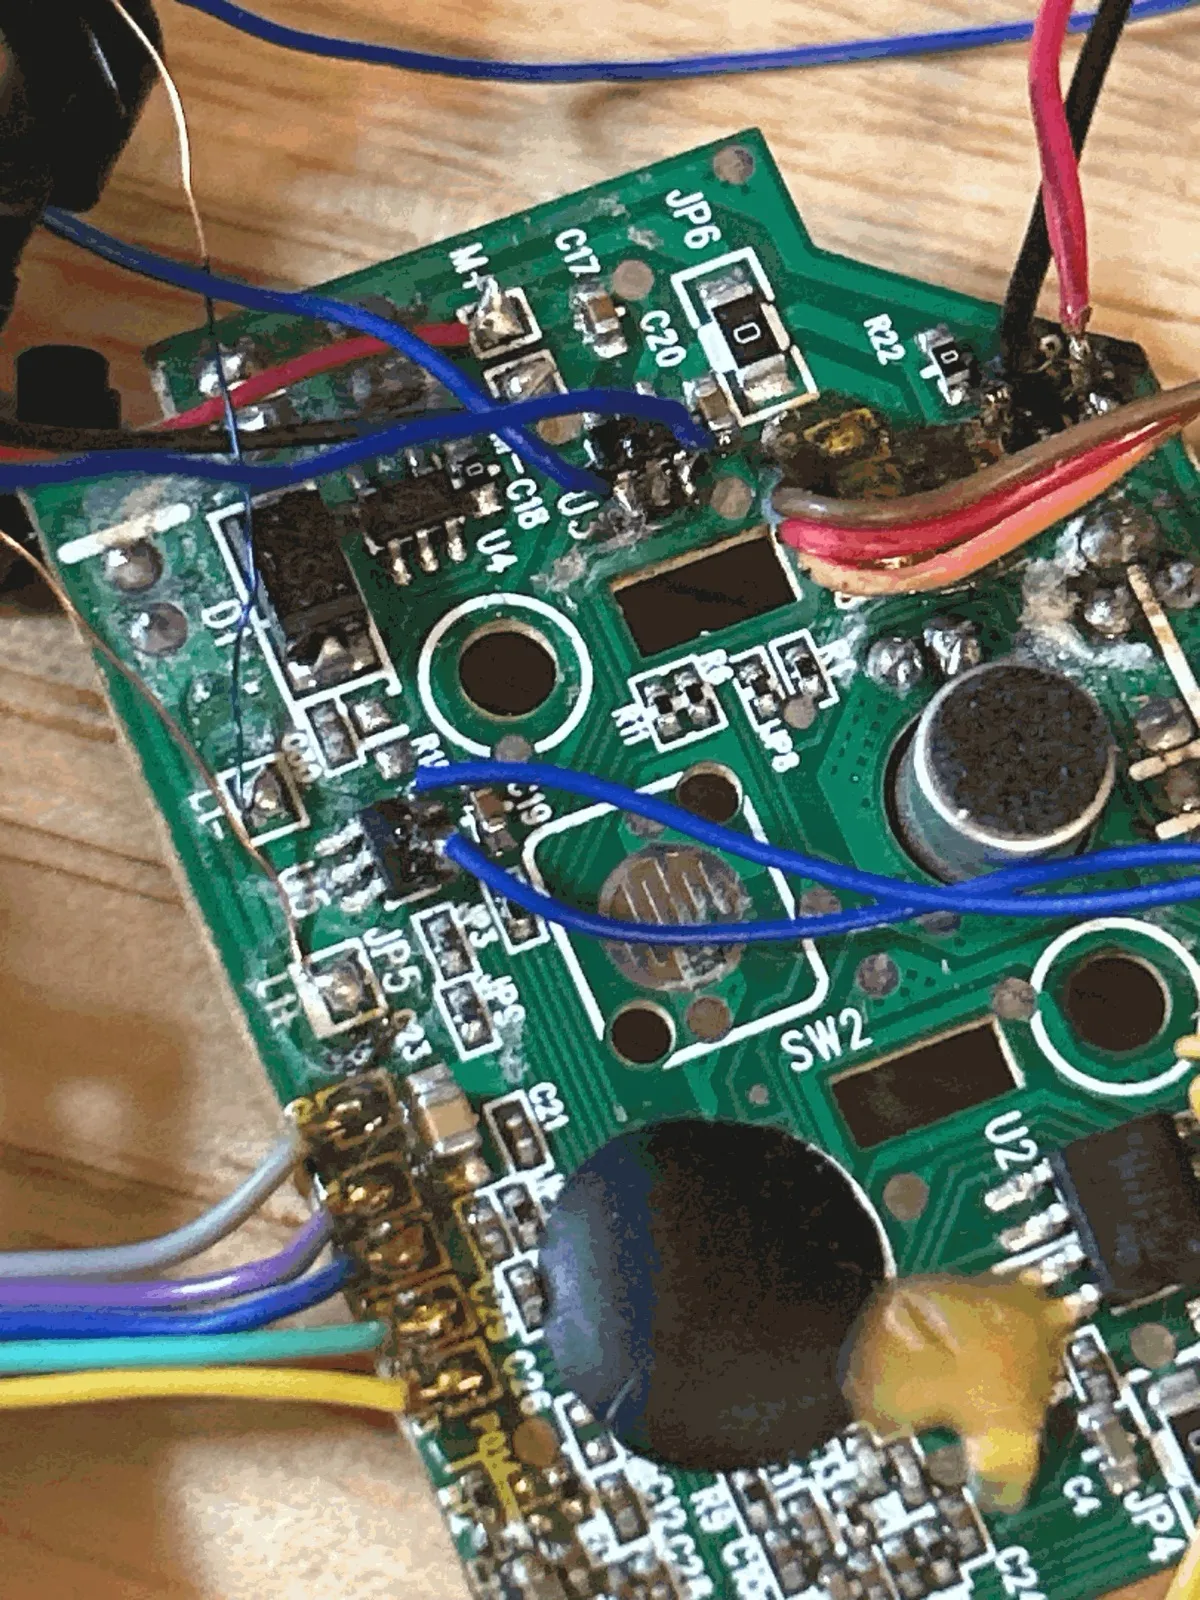
Then U5, and it could steer. One warning has to come first here: the two steering wires must go to U5's input pins, never straight to the coil, or you will burn out a pin on the FT232H. U5 is a SOT-23-6 package; of its six pins, rule out power, ground and the two coil ends, and the remaining two are the inputs.
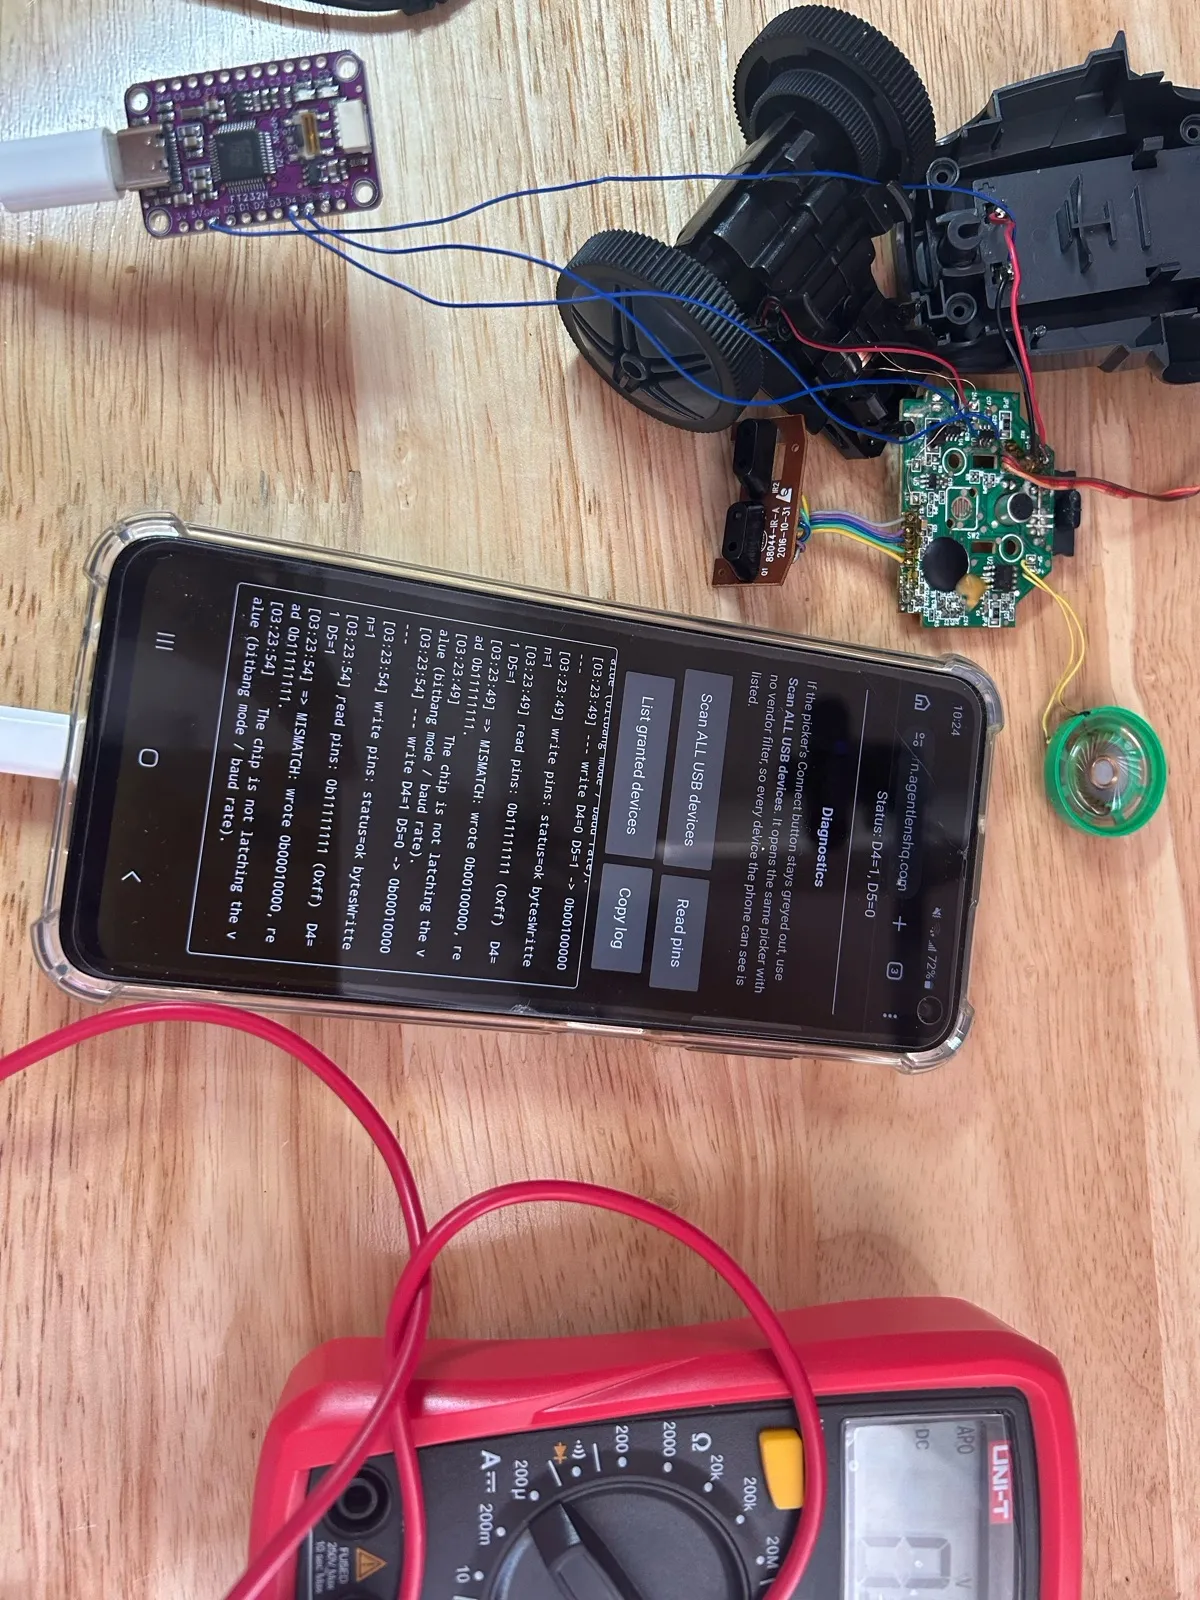
This is what my desk looked like for those few days: the phone running a debug page, plugged into the FT232H, the FT232H wired to a robot in several pieces, a multimeter beside it. Only Chrome on Android has WebUSB — iPhones don't — so the brain had to be an Android phone.
4. One bug, fixed twice
The car finally moved, but not properly. I told it to turn right for 600 milliseconds and it just twitched — too briefly to even tell which way it turned.
The cause was hiding in an innocent-looking assumption. In this mode the FT232H outputs "one byte per clock tick", but the code assumed "one bit per tick", so every duration came out 8 times too short. I fixed it, timed it once with a stopwatch, got about 2 seconds — close to the prediction — and thought it was done.
It wasn't. A day later I switched to timing it from the chip's own pin readback, and the real rate was 5 times what I thought: the chip's clock is 60 MHz, and the code, following an open-source library, was computing with 12 MHz. 60 divided by 12 is exactly 5. So the "600 ms" turn had actually run for 120 ms.
Why didn't the stopwatch catch it? Because the real movement lasted half a second, most of what a hand on a stopwatch measures is reaction time, the motor keeps coasting after it stops — and the number the stopwatch gave happened to match what the code expected. A measurement that agrees with your expectation is the hardest one to doubt. After that I changed the measuring tool to record the full pin trace, and the readings became something you could argue over instead of a hunch.
5. Ears, a brain and a mouth
With the hardware working, the rest was software. The whole pipeline fits in one line:
you speak → speech to text → the model decides what to do → drive / talk
- Ears: Whisper on Groq for speech to text. About 4 cents per hour of audio — an afternoon of play costs pennies.
- Brain: DeepSeek. It can call a few tools: drive forward for a few seconds, turn, stop, play a sound.
- Mouth: cloud TTS, played through the page's WebAudio.
I had planned to use Picovoice for the wake word, but as soon as I started I found its free tier had ended at the end of June 2026, and the paid plan starts at $6,000 a month. In the end I switched to the open-source sherpa-onnx and compiled it to WebAssembly to run in the phone's browser. The file is 8 MB: slow on the first load, cached after that.
Another small trap: the new DeepSeek "thinks" before answering by default, so every sentence waited for it to finish thinking before the robot opened its mouth. For a robot a kid is going to shout at all day, those few seconds are far too long. Turn thinking off and it suddenly gets quick-witted.
Everything runs in one web page, with no server. The keys live only on the phone and go straight to the providers you pick.
This is where I parted ways with Mario the most. On his side the phone is a "dumb terminal": it records, plays sound, takes photos and drives over USB, while the real brain is a server on a laptop — listening, thinking, talking and the agent he built on pi all live there, all on local models (Parakeet to listen, Gemma to think, Qwen3 TTS to talk).
On my side the brain is the web page in the phone's browser. The wake word and the "is anyone talking" check run locally on the phone; the three heavy jobs — listening, thinking, talking — go to cloud APIs, called directly from the page; and the loop that decides what to do next lives in the page too.
The first version uses cloud APIs for two reasons. One is speed: get it moving first, and leave privacy and local models for the next version. The other is the barrier to entry: not everyone who wants to build one has a computer at home that can run the models, but almost everyone has an old Android phone.
6. Sixty seconds after the screen goes off, it goes deaf
At this point a strange problem appeared: once the phone's screen turned off, after about 60 seconds the robot couldn't hear anything any more.
Stranger still, the first time I tested it, it didn't go deaf at all — it kept listening for five minutes with the screen off. Only later did I work it out: that time the phone was connected to my computer over wireless debugging, and the debug connection was what kept the phone awake. The connection I'd added to get around a deployment problem had changed the very thing I was trying to test. Once I disconnected it, three reproductions — 59, 60 and 65 seconds — and Android took the microphone away right on schedule.
My first idea was a hack: while the screen is off, play a very faint "breathing" sound, 220 Hz, rising and falling every 4 seconds, so Chrome thinks it's playing music and won't take the microphone away. It did work: five minutes with the screen off, listening the whole time.
But I deleted it later. A trick like that relies on a behaviour of the system, not a promise, and an Android update could quietly break it any day. I replaced it with a more honest rule: the screen is its eyes. When it's on, it's listening — no wake word needed; when it's off, it stops the car and closes its ears. The phone is its face anyway, and a kid understands that rule at a glance.
7. Off with its head, on with a face
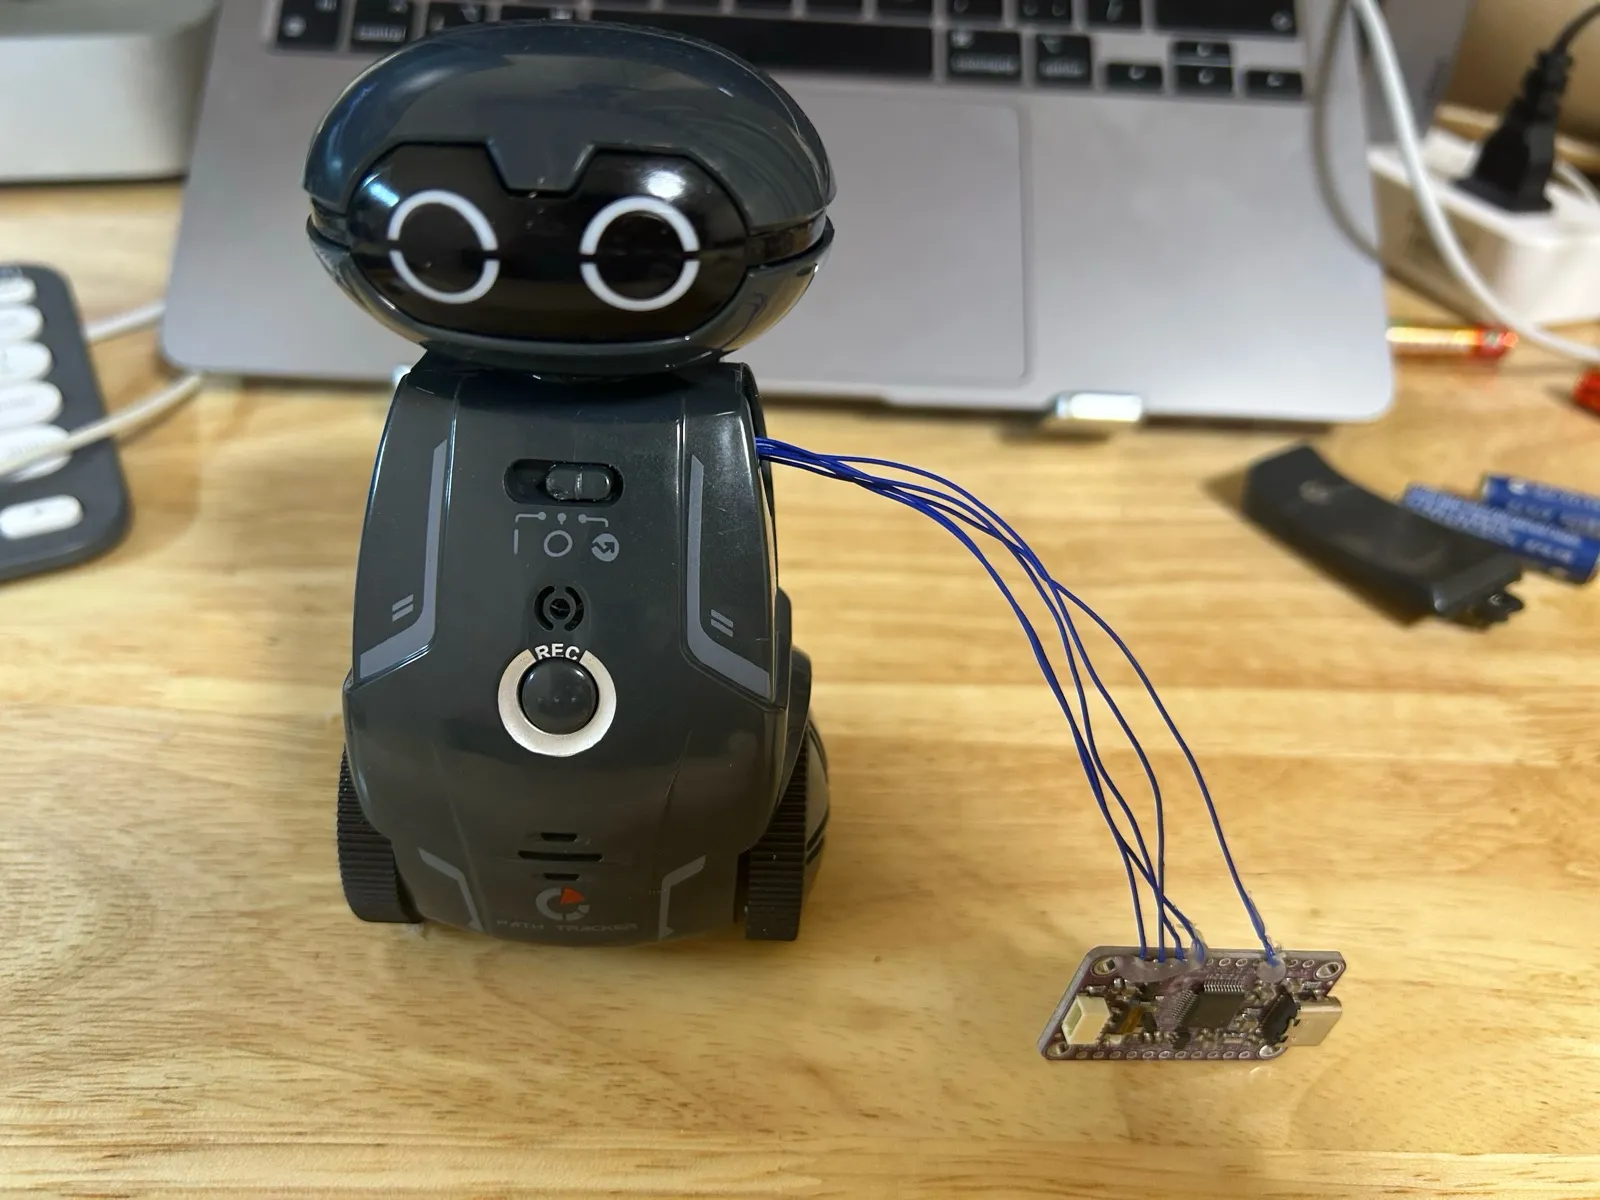
At first the robot kept its original head, the phone sat beside it, and the FT232H dangled outside the body. Then I decided the phone should "ride" on the car: its screen was the robot's real face. The problem was that the head was in the way, and the phone wouldn't fit on top.
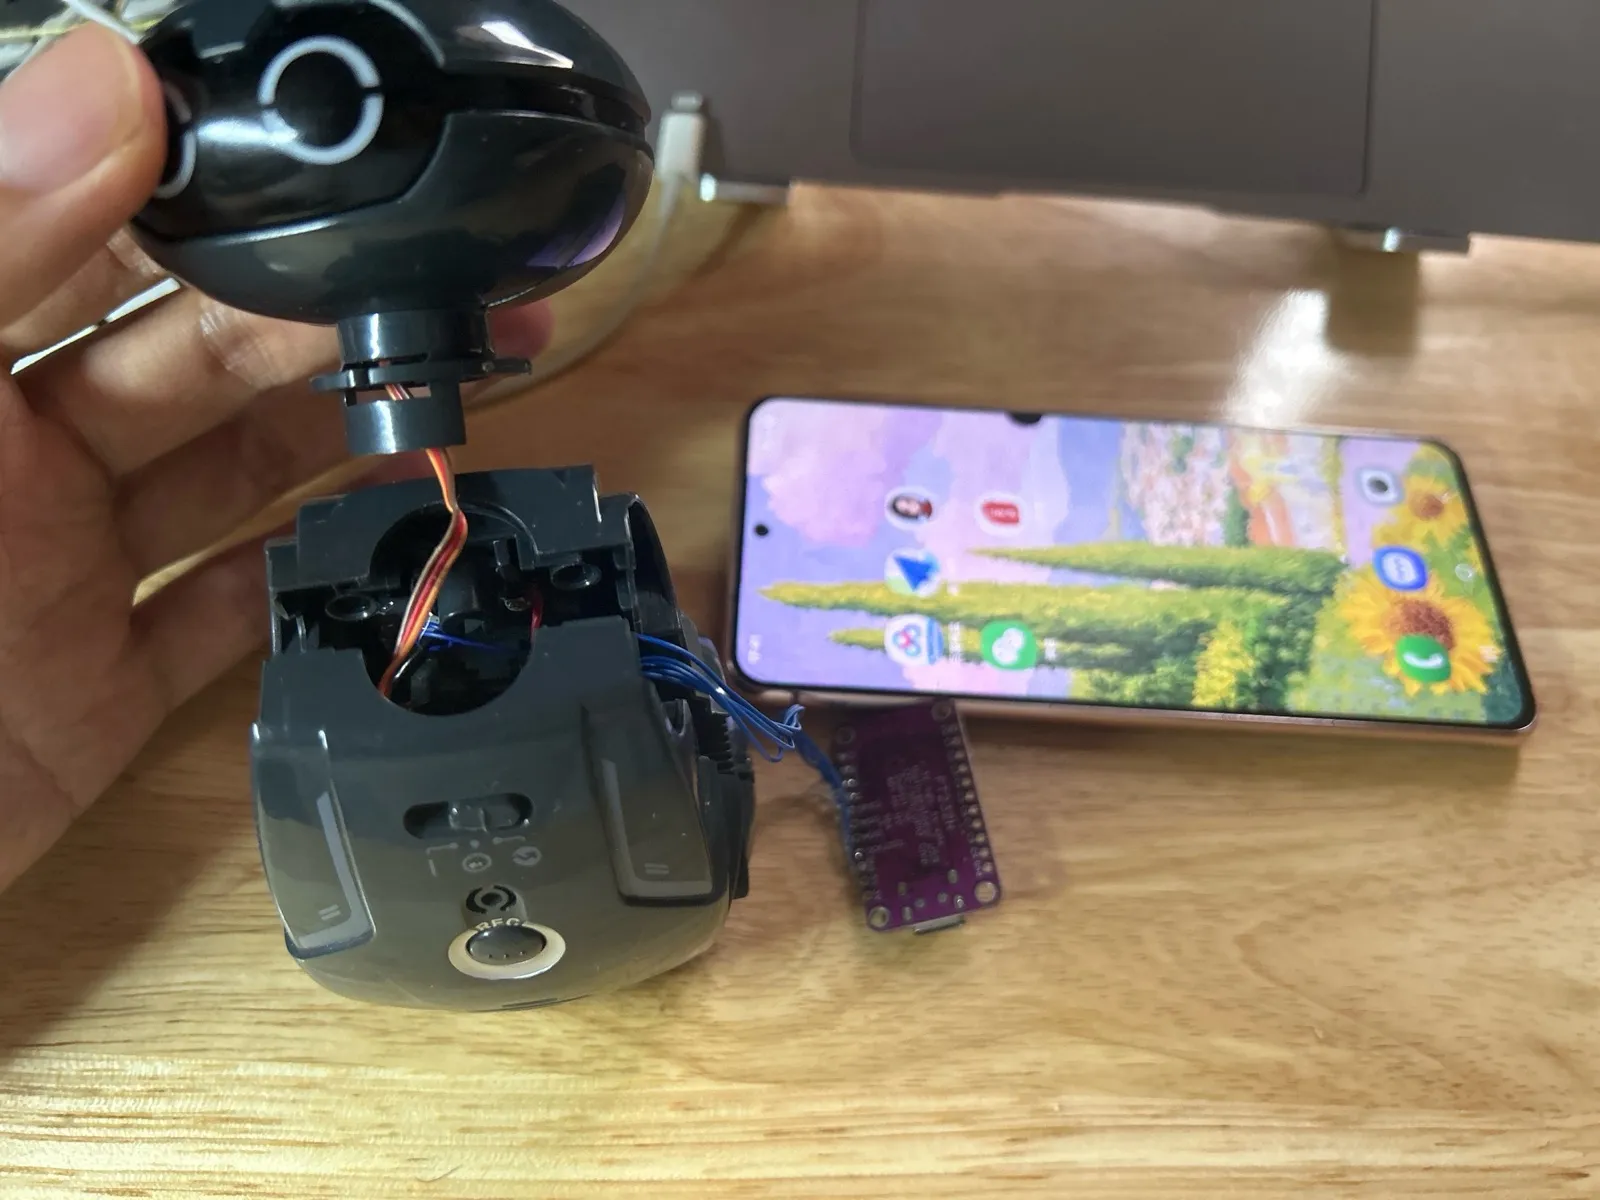
So the head went.
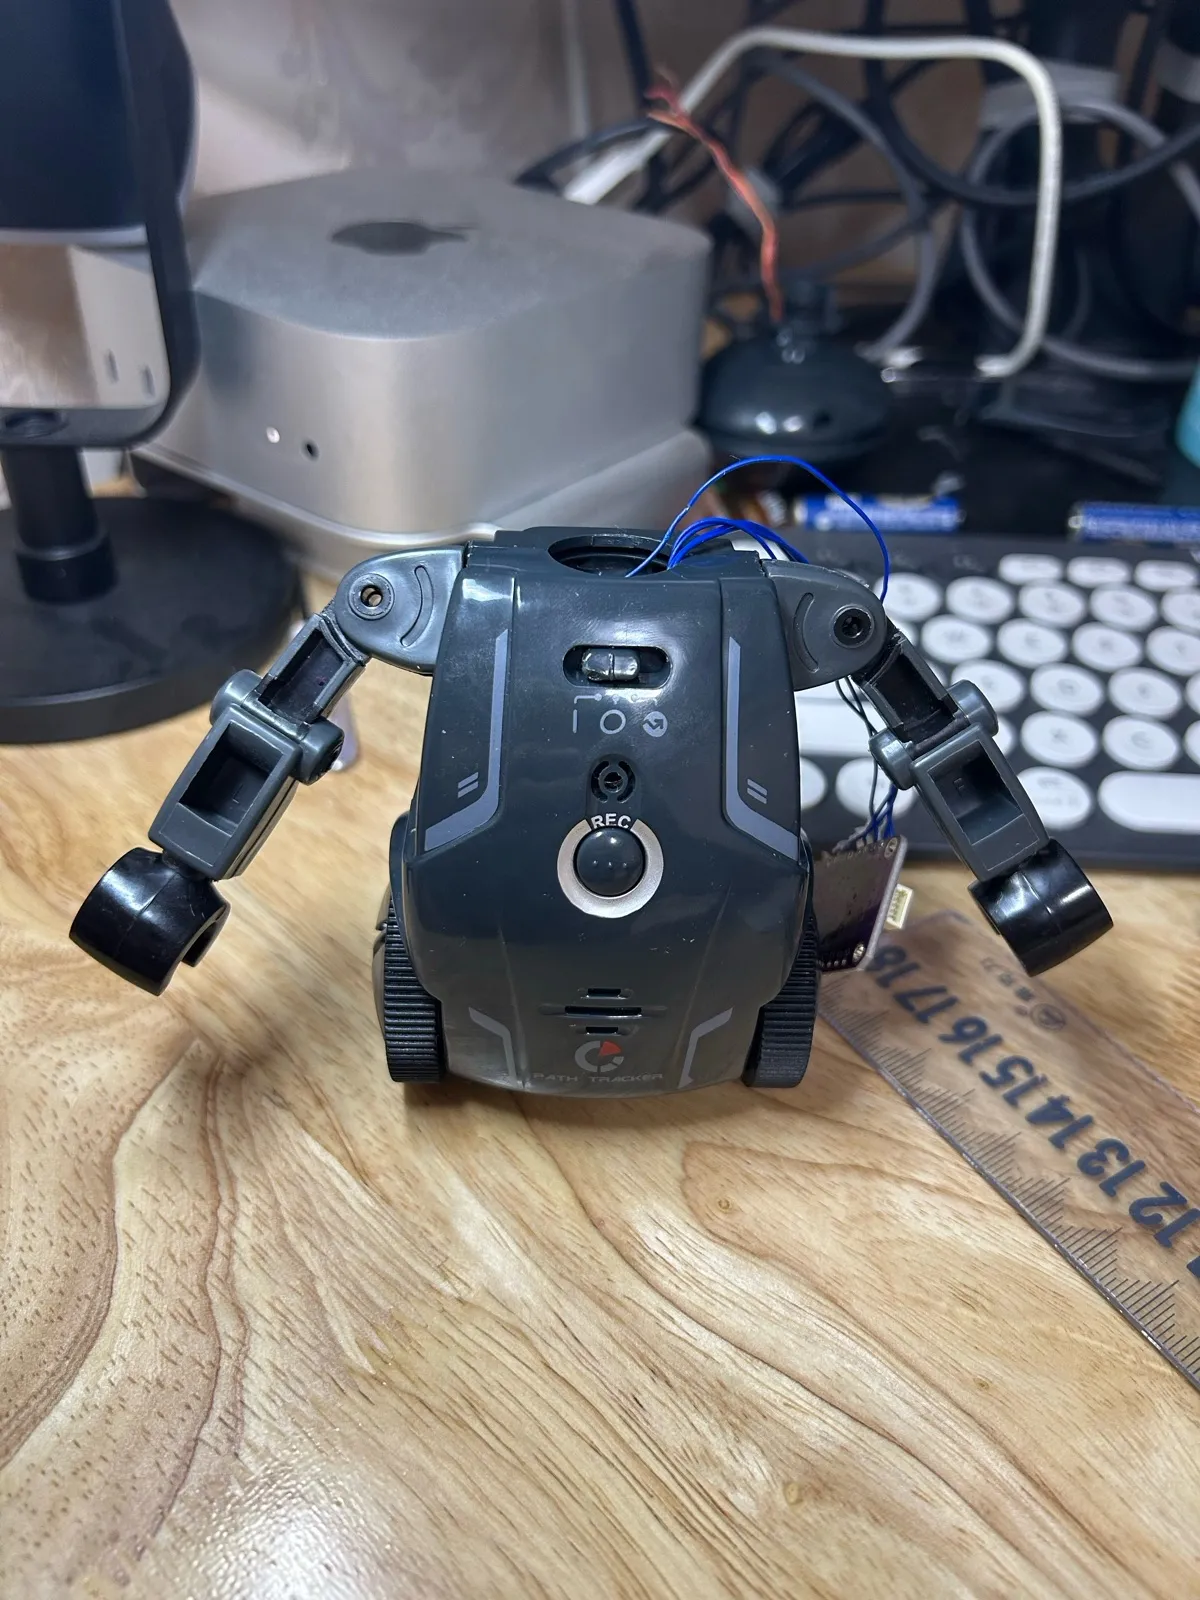
With the head gone, all that's left on top is a neck socket that can't be removed and two shoulder joints.
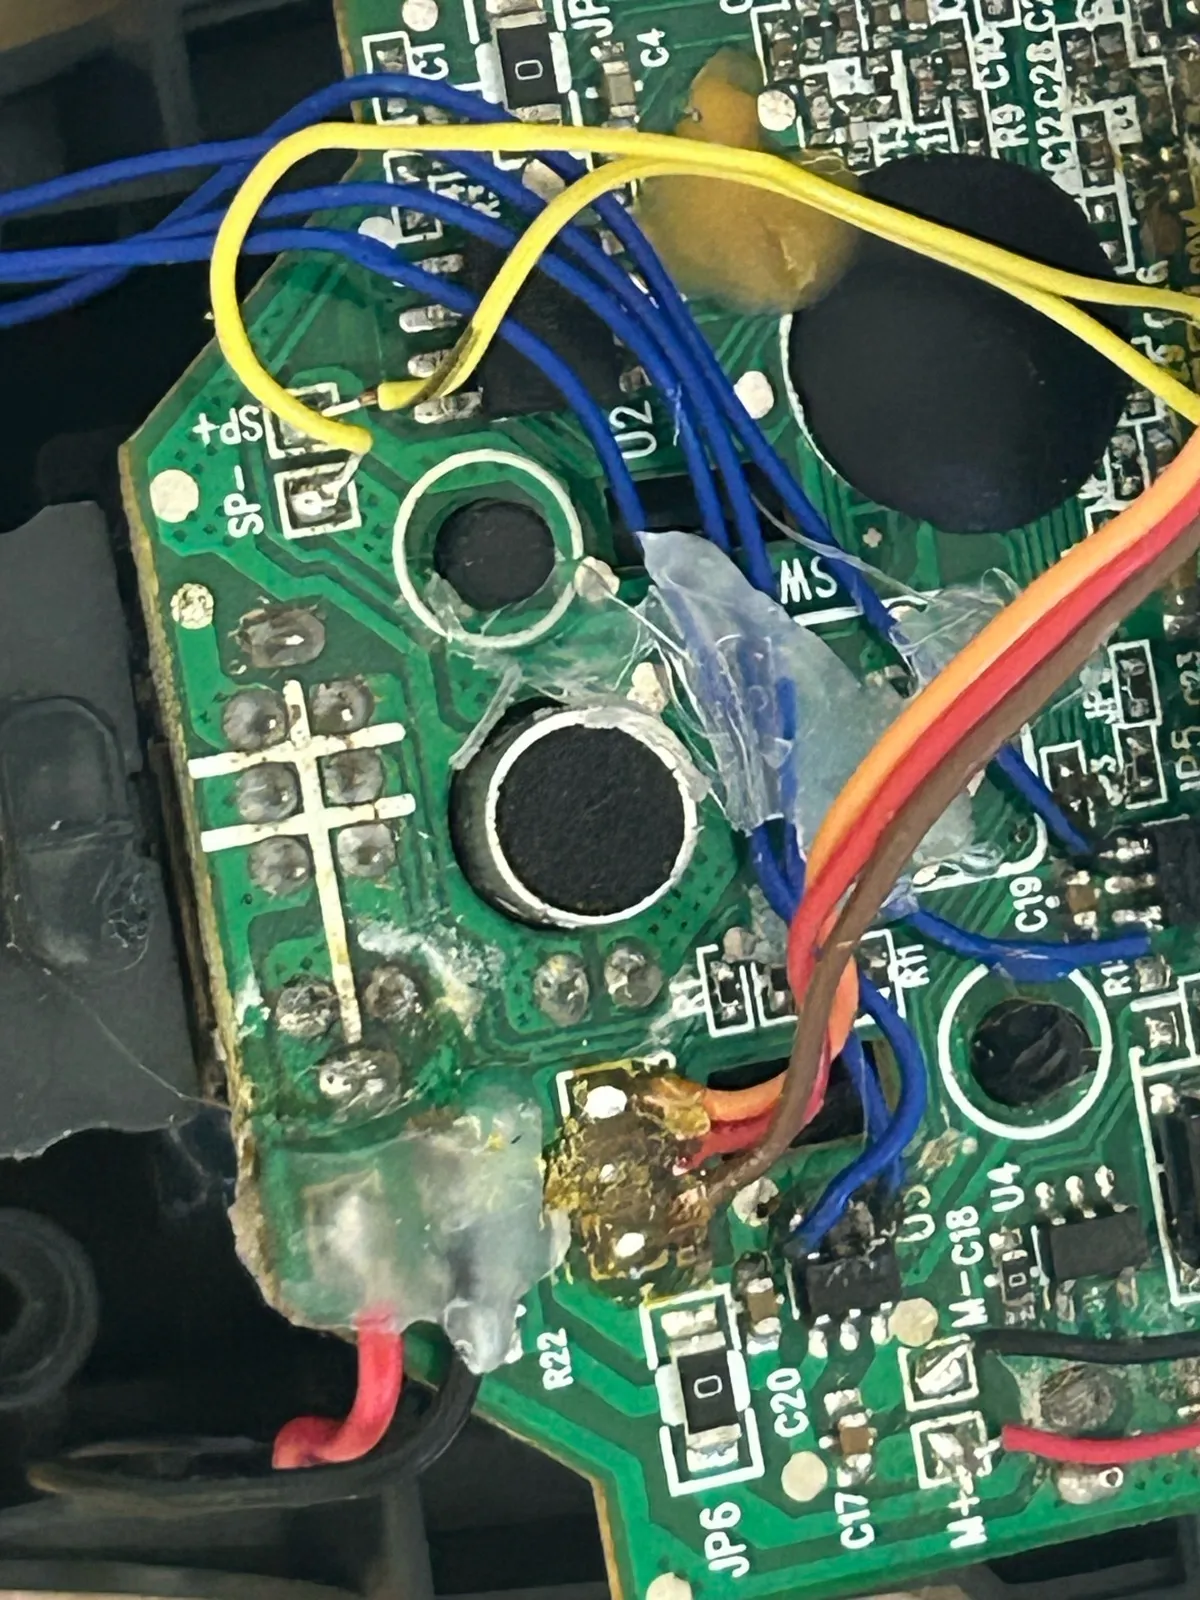
There was an episode in the middle, too: the power wire at the bottom left of the board snapped three times while I was building. After the third time I learned my lesson, put a big blob of hot glue over the power joint, and it never broke again.
The mount is made of cardboard. Before cutting anything I measured the body with a ruler: 85 mm tall, narrow at the top and wide at the bottom, sloped on every side. Then Claude and I drew up a set of plans: split the front leg into two prongs so the switch and the REC button stay exposed; stack three spacer layers on top so the phone sits above the shoulders; and add a wedge so the phone leans back 12 degrees.
When it came to actually building it, I cut all of that. I had no use for the REC button, so it didn't need to show; the spacers weren't needed, and raising the phone raises the centre of gravity, so the car wobbles every time it moves; and without them the wedge went too. The plans were only a reference, and what I built is much simpler:
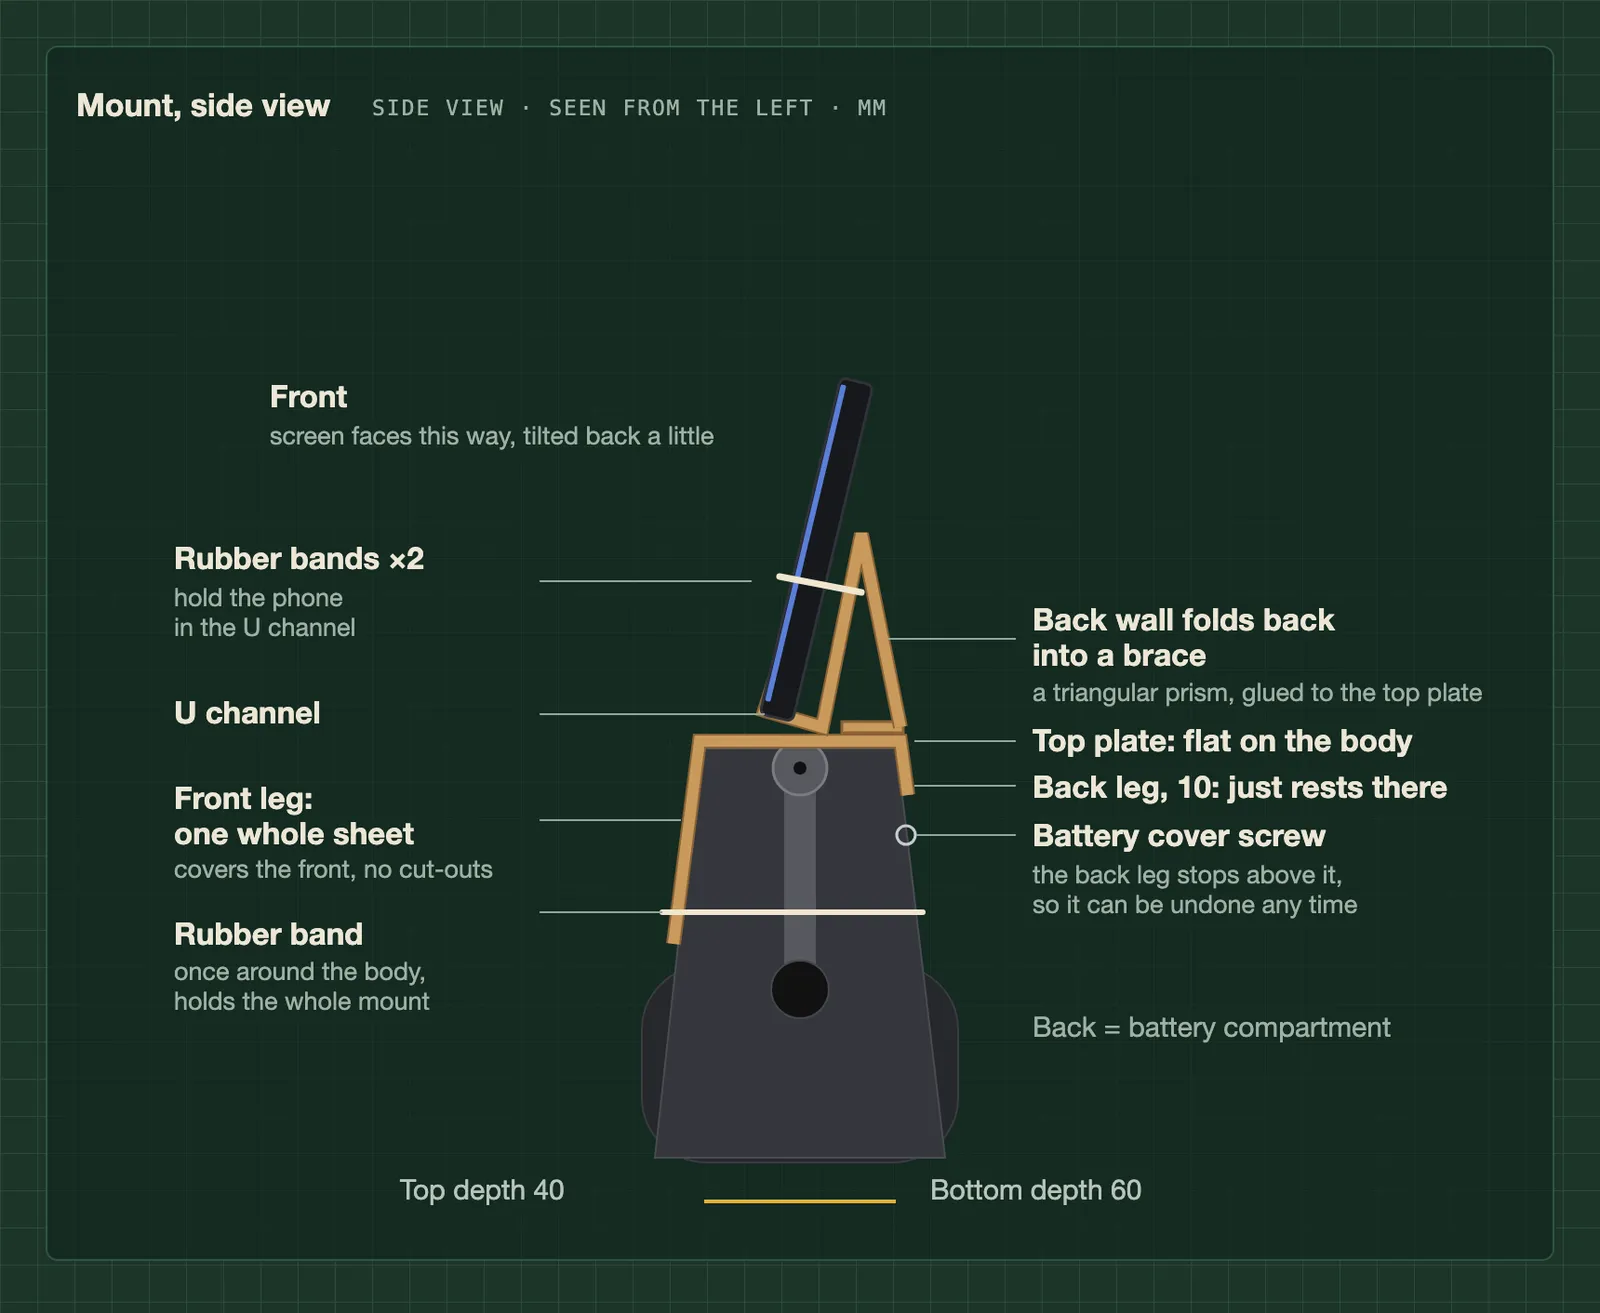
One piece of cardboard straddles the body front to back: the front leg covers the whole front, and the short back leg rests on the back, stopping just above the battery compartment's screw, so changing the batteries doesn't mean taking the mount off. On top sits a U-shaped channel, with its back wall folded back into a diagonal brace that forms a triangular prism, and the phone leans in it, tilted slightly back. Everything is held by rubber bands: one goes around the body to hold the mount, two hold the phone in the channel.
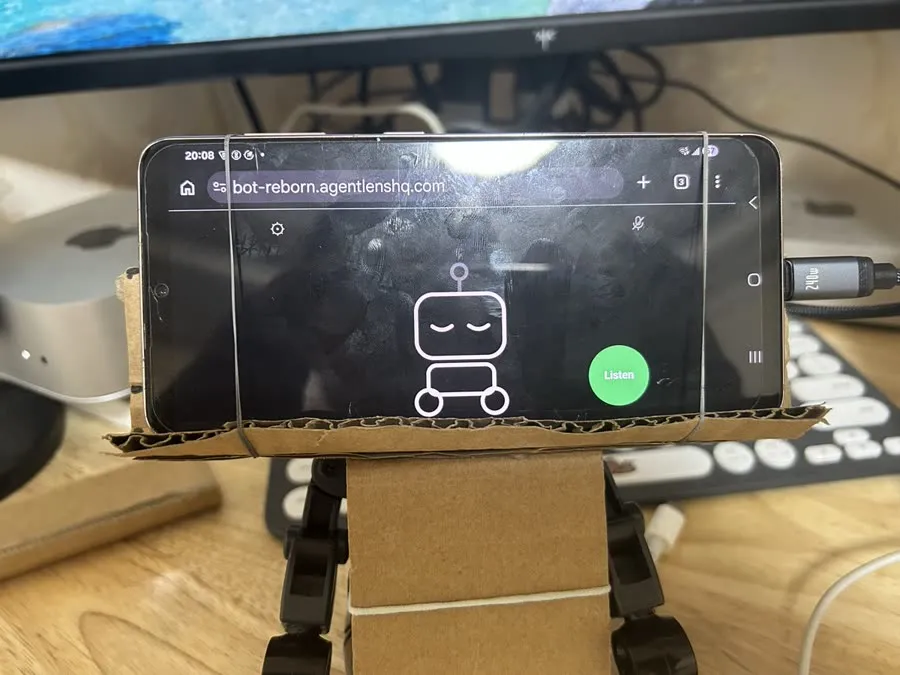
This is how it turned out.
The phone sits sideways, and its screen shows the robot's face. To make it full screen, landscape and without an address bar, I made the page an app you can "add to the home screen". It has five expressions: asleep, listening, heard you, thinking and talking.
8. It's a machine, so it can't be teased
What happened next is my favourite part of this project.
My kid soon discovered that barking at the robot was great fun. But every time, the robot replied with a perfectly serious sentence and then stayed exactly where it was.
The problem was in two places. First, the opening line of the system prompt was "You are a small robot" — and robots can't be teased. Second, the prompt had a rule saying "if the user is just chatting, don't call any tools", which banned the only way it had of showing emotion: moving.
I changed it to "a small creature with a temper" and allowed a chat to end with a movement.
Then the second problem arrived. In Chinese a dog says wāng wāng (汪汪). Whisper kept hearing it as 忘忘 — the same sound, but it means "forget, forget" — or sometimes as "Wong Wong", and a cat's miāo miāo came out as "Miau Miau". The model would receive "forget forget" with no idea that someone had just barked at it.
I first tried putting 汪汪 and 喵喵 (the words for woof and meow) into the speech recognition prompt, and it did help. But I took them out again before long: a hard-coded prompt only looks after one user. Now speech recognition runs with no prompt by default, and homophones like 忘忘 are left for the reflex layer further down to recognise.
My kid, meanwhile, found a fix all by themselves: bark at it in English instead — "woof".
In the end I simply gave it a reflex layer, built on JEV.
JEV is a model from TypeSafe that took off only in the last few weeks, and the moment I saw it I knew it fit. It isn't like a chat model: it doesn't generate text, it only judges. You give it a situation and a multiple-choice question, and it tells you the probability of each option.
The question I gave it is "what is this person doing", with three options: imitating an animal, giving a command, or replying normally. The question also includes the robot's previous line, and a reminder: 汪汪 may be transcribed as 忘忘 or 往往, and a meow may come out as 苗苗; but short replies like 明白 ("got it"), 好的 ("okay") and 嗯嗯 ("mm-hm") always count as a normal reply.
It only counts if "imitating an animal" scores above 0.8. Once it counts, the big model isn't asked at all; the robot reacts with a fixed routine:
- bark back;
- barked at again: one bark, then turn and run;
- still barked at: a whimper, then back away.
It's about what people do when they're startled: react first, think later.
Compared with handing everything to the big model, this has three advantages. It's fast: when it's barked at, it doesn't wait for the model to finish thinking and then for speech synthesis to finish talking — a sound effect plus a movement is the answer. It's cheap: one "woof" isn't worth a call to the big model. And it's accurate: the big model reads 忘忘 literally, while the question JEV gets already says "this might be a bark".
When I set the rules, what worried me most wasn't missing a bark but mistaking something else for one. A miss just falls through to the big model; a false alarm means a kid's earnest "got it" gets swallowed as a bark. So the threshold is set on the high side, and JEV is only asked about short utterances: at most 6 characters in Chinese, at most 3 words in English. Long sentences don't sound like barking and aren't worth the extra wait. Movement commands aren't its business either: the big model handles commands with parameters better, and the most urgent one, "stop", has a local emergency stop word.
9. How it started, and how it's going
From opening it up to its first complete run took about a month. Almost every line of code in that time I wrote together with Claude: I did the taking apart, the soldering, the testing and the decisions; it turned ideas into code; and together we fixed whatever the tests turned up.
I recorded a 17-second video: the robot plays with my kid on the floor, while the real dog next to them keeps its head in its bowl the whole time and glances over exactly once. The title is "Real dog: busy eating. Robot dog: on duty." (watch on YouTube)
Later it picked up a second job: while my kid does homework, it sits on the desk answering science questions, now and then with a bit of attitude. (watch on YouTube)
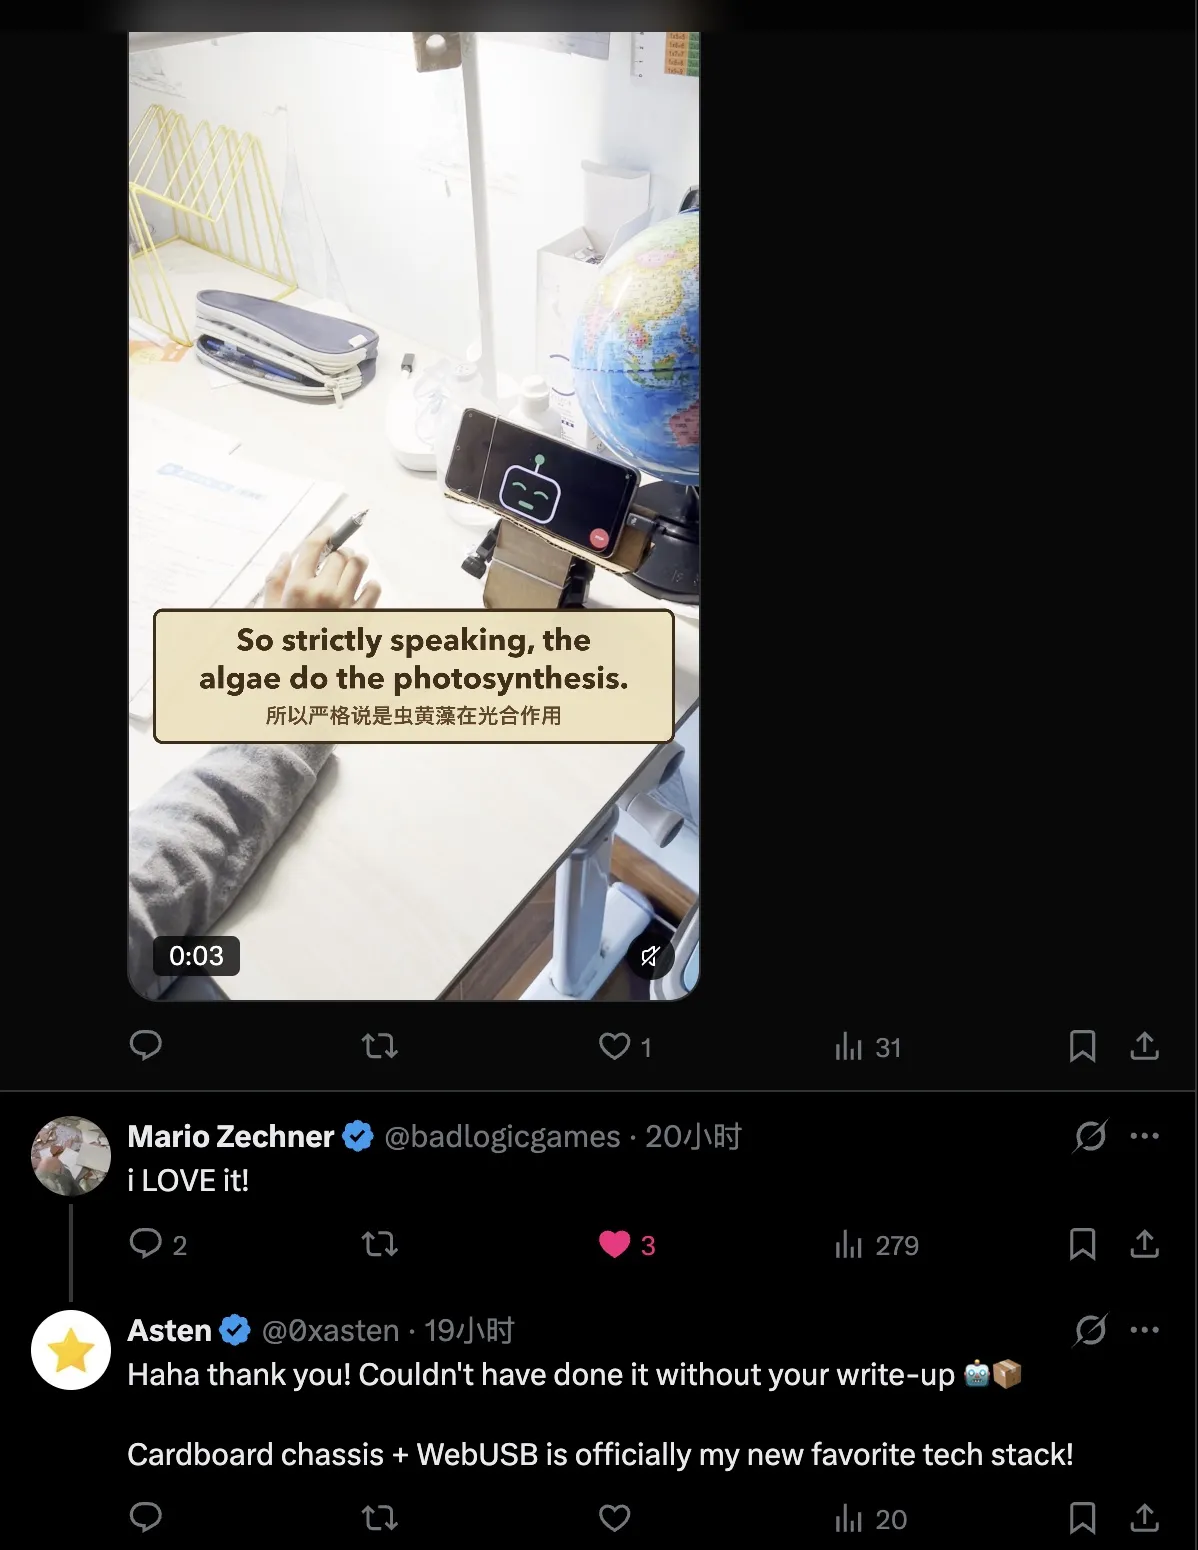
I posted the video on Twitter and tagged Mario. He replied "i LOVE it!" and reposted it. A month earlier I was reading his post; a month later he was watching my robot.
Thank you, Mario. Without his post this robot wouldn't exist. He gave me the idea, and he had already cleared the hardest stretch of the road: the phone as the brain, the FT232H, WebUSB — I followed his route for all of it and saved a great deal of fumbling. Part of why I'm writing this is the hope that it helps the next person who wants to build a companion robot for their kid, the way his post helped me.
These days my kid explores what it can do on their own, and their favourite thing is still chatting with it.
What surprised me most while building it is that many of the good ideas weren't mine — they came from my kid playing. Barking at it was my kid's discovery, and that's what led to "a small creature with a temper" and the reflex layer; when 汪汪 was heard as 忘忘, my kid switched to "woof" on the spot. Each of my kid's reactions was the fastest feedback I could get, telling me what to change next.
The robot is far from finished, but it already plays with my kid and chats with my kid. That's what I wanted in the first place.
Want to build one?
The code is open source under the MIT licence at github.com/beasaltfish/bot-reborn. You'll need:
- a cheap toy car or robot with a motor and steering;
- an FT232H board;
- an Android phone (Chrome) and a USB-C cable;
- API keys for speech to text, a language model and speech synthesis — anything with an OpenAI-compatible API works;
- a soldering iron, a few wires, cardboard, rubber bands, and ideally a hot glue gun.
There's nothing to deploy: open bot-reborn.agentlenshq.com in Chrome on the phone. The robot tells you what it's still missing: the keys, plugging in the board, and then teaching it which way is left. The wiring and pin tables are in the repo's docs/hardware.md — read the warning there before you solder the two steering wires.